How to Set up A Google Ads Profile
- How to set up A Google Ads Profile
- Step 1: Sign in or Get Started
- Step 2: Set up the basics
- Step 3: Tell them what sets your business apart
- Step 4: Confirm your website
- Step 5: Adjust your target audience
- Step 6: Review the campaign so far
- Step 7: Add short and long headlines
- Step 8: Add descriptions
- Step 9: Upload images and logos
- Step 10: Confirm your business name
- Step 11: Add links to your campaign
- Step 12: Choose your Call to Action
- Optional Step: More Settings
- Step 13: Understand and set up your bid strategy
- Step 14: Budget and payment details
- Step 15: Submit your profile application for a Google Ads account
How to set up A Google Ads Profile
Step 1: Sign in or Get Started
Start off by heading over to the Google Ads homepage. From here you can choose to 'Sign in', or if you're already signed in you can choose 'Get Started.'
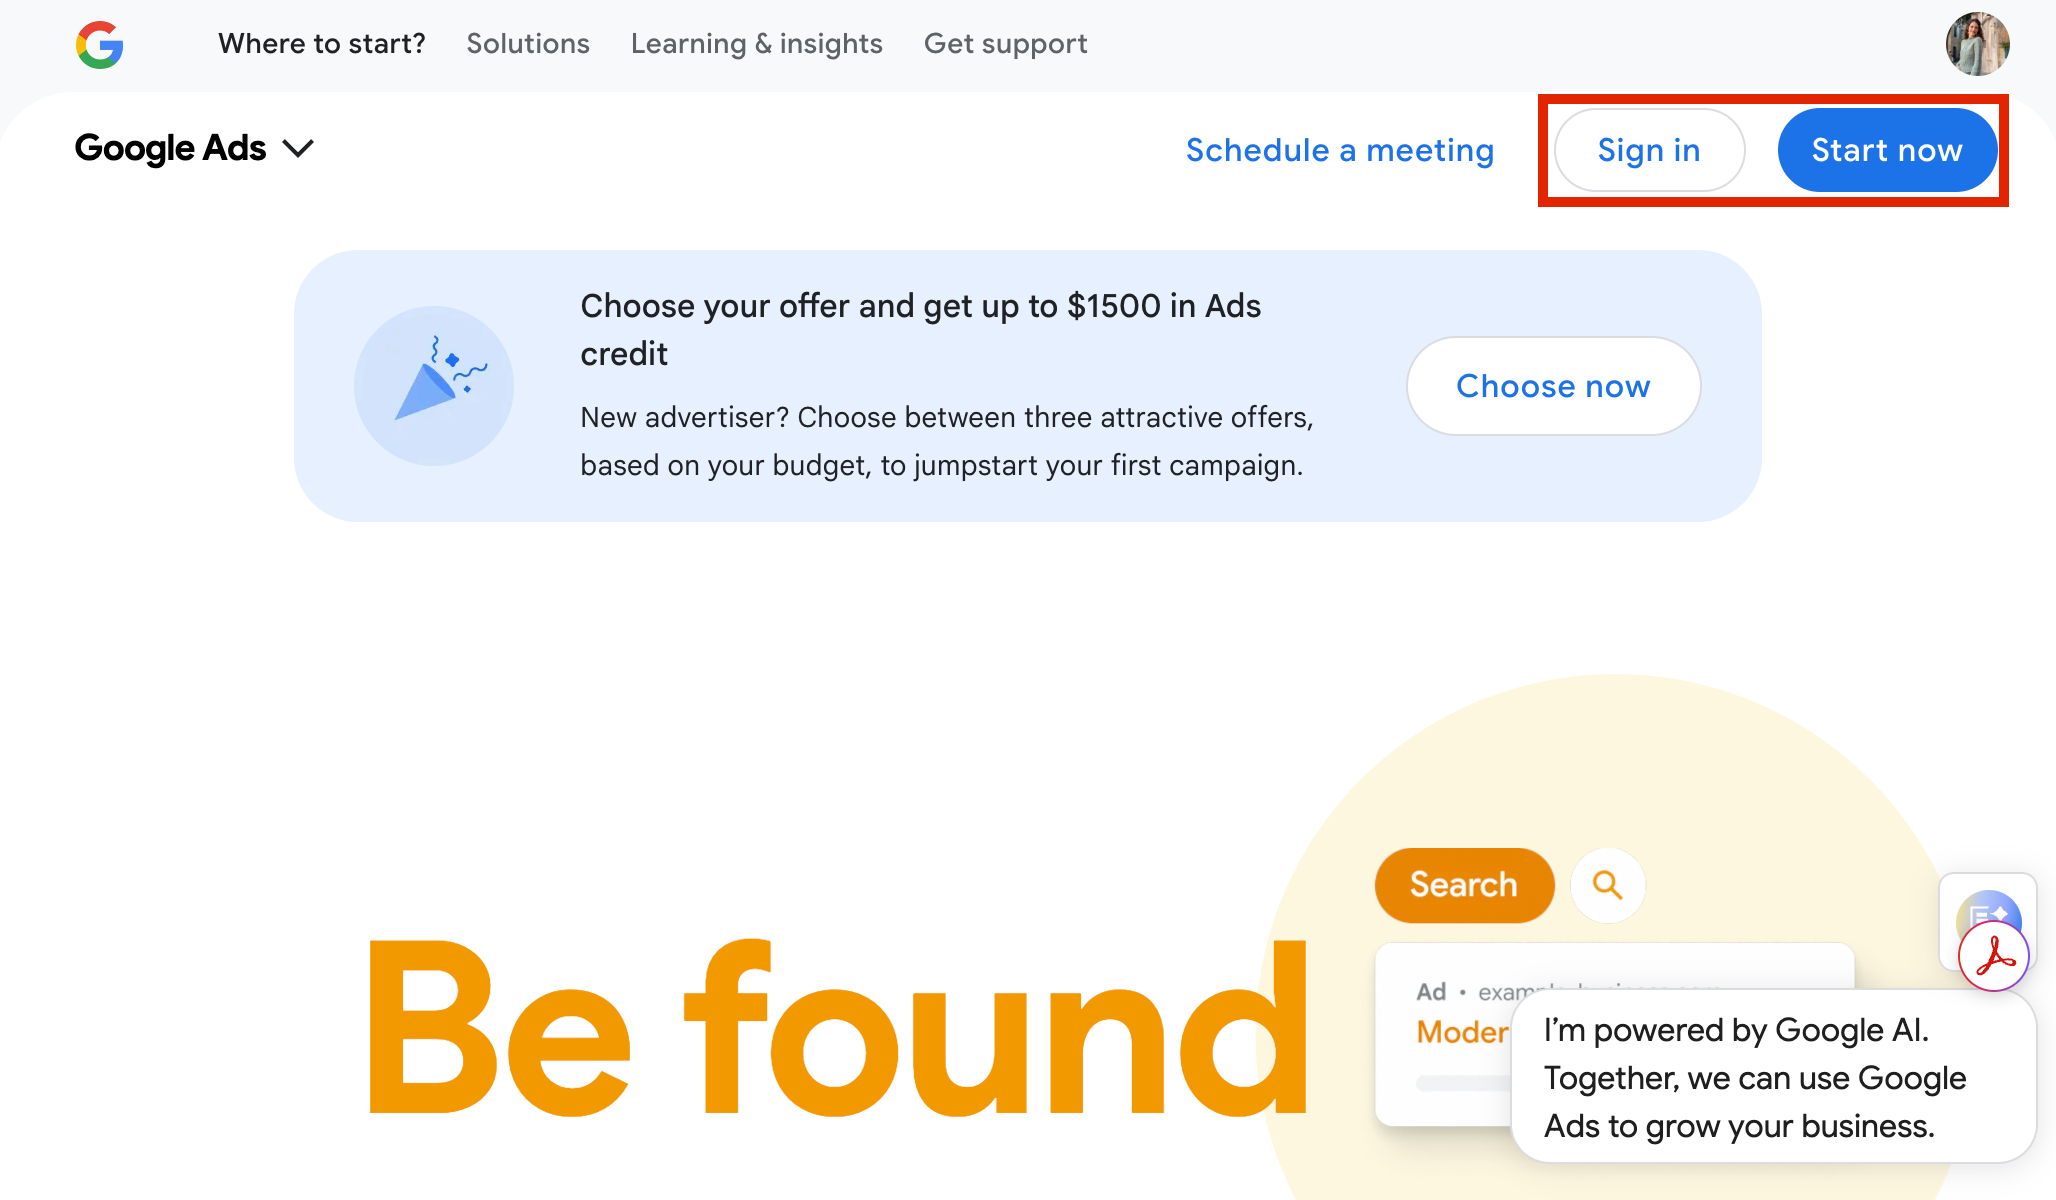
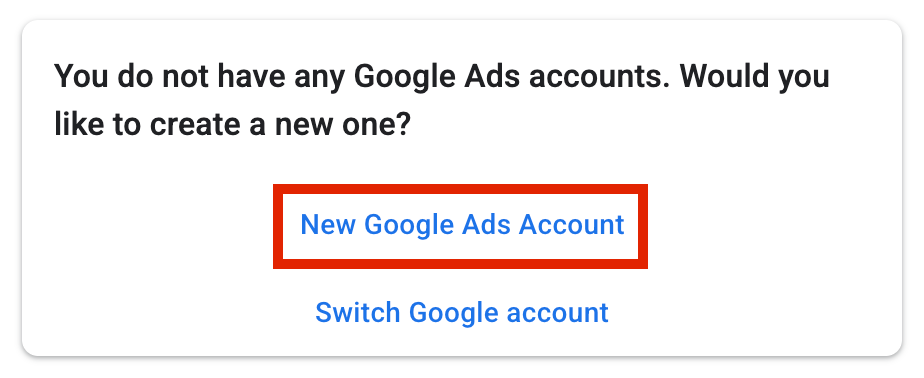
If you don't already have an Ads account set up, you may see this message, so choose to create a new Google Ads Account!
Step 2: Set up the basics
You set up your Google Ads account at the same time that you set up your first campaign. It's a great way to review your profile and understand how to create ads also in the future.
First off you'll be asked to review some of your business information. If your Google Account email is associated with a business profile already, then you will see that information automatically pop up here. If you don't have a Google Business profile yet and would like to create one, you can follow our tutorial on how to get started HERE.
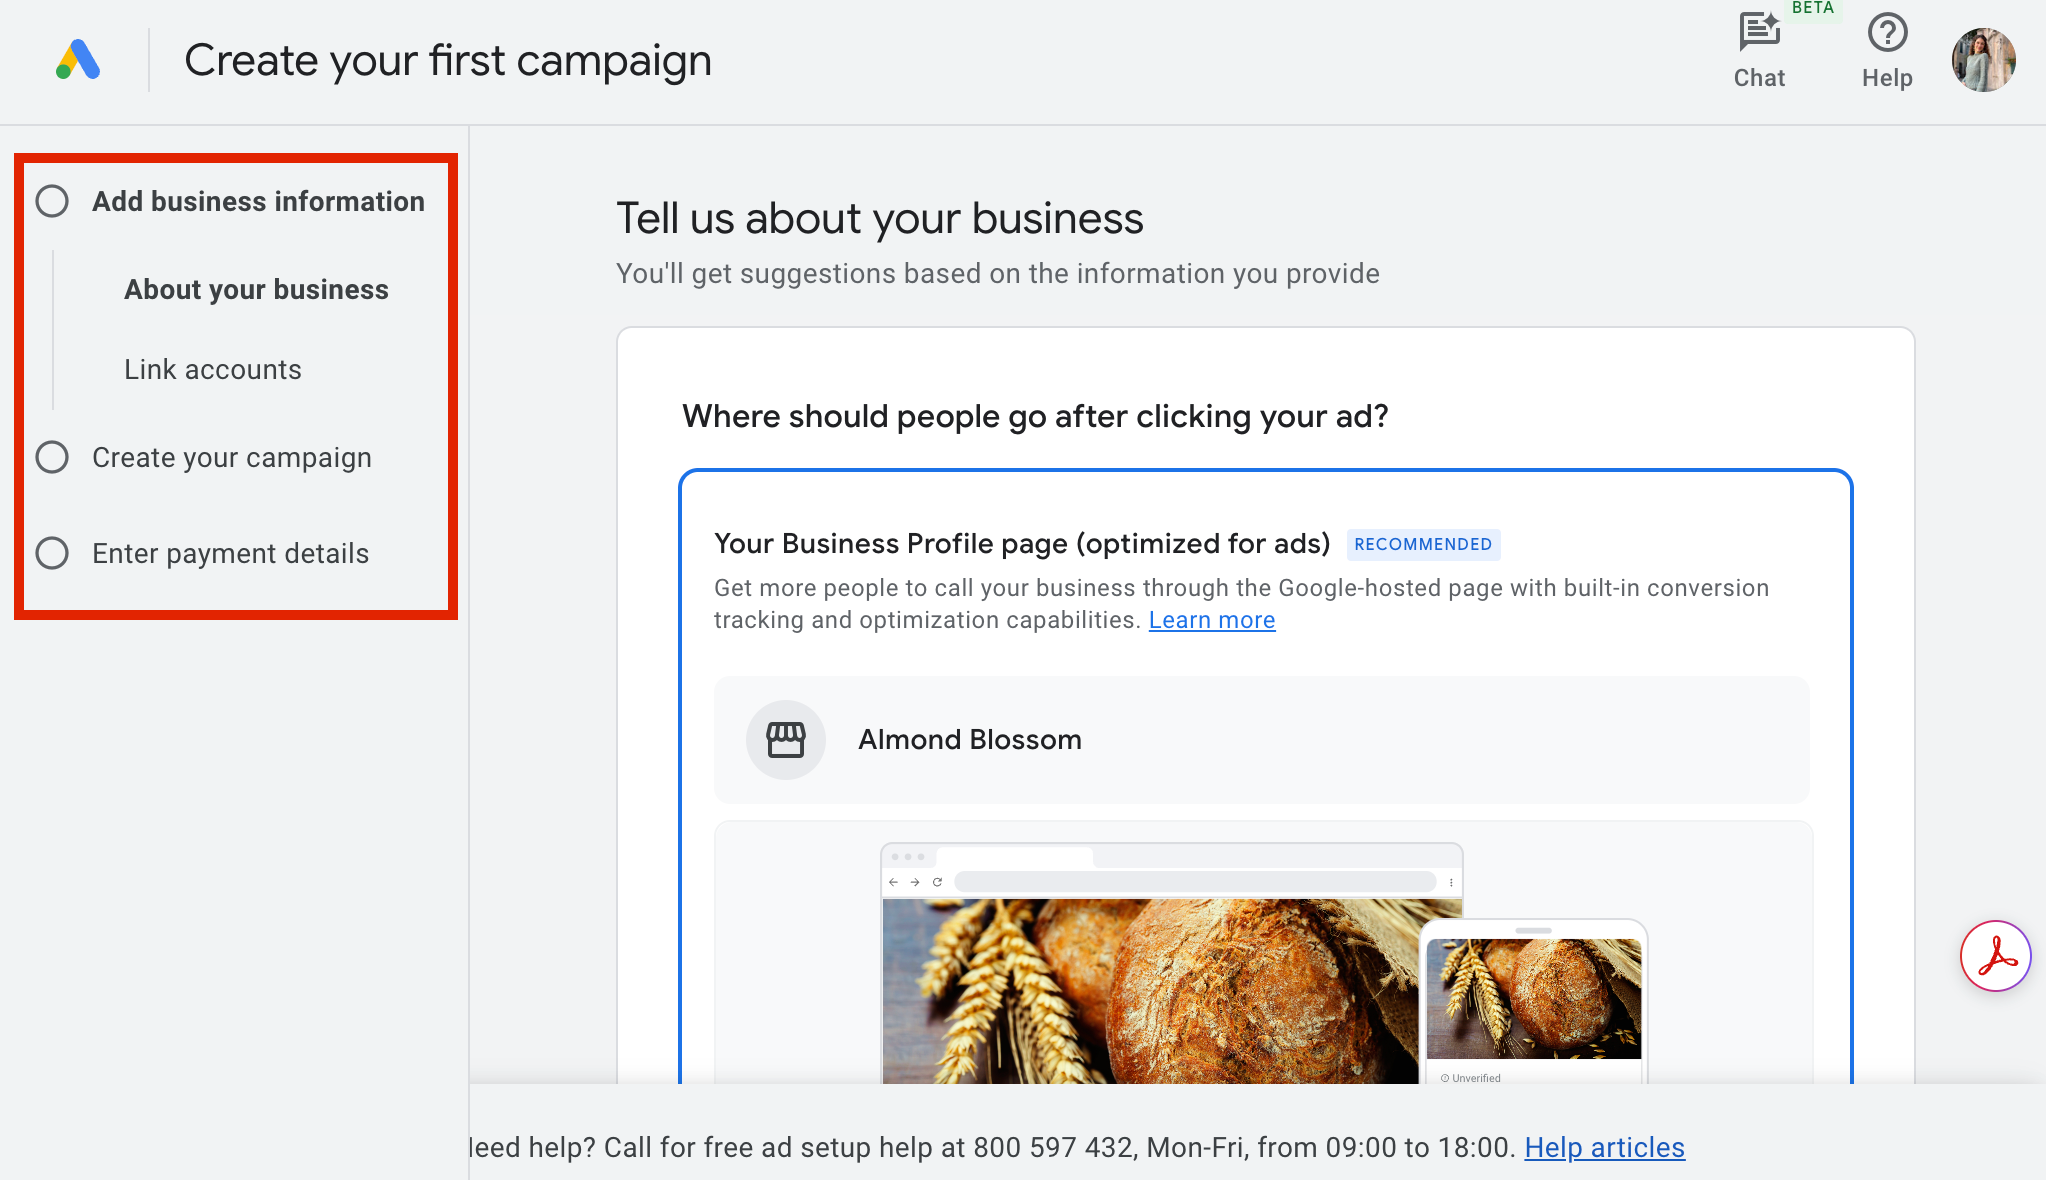
If you're not happy with what you see, you can choose 'Select a Different Option.' Otherwise choose 'Next' to move on to the next step.

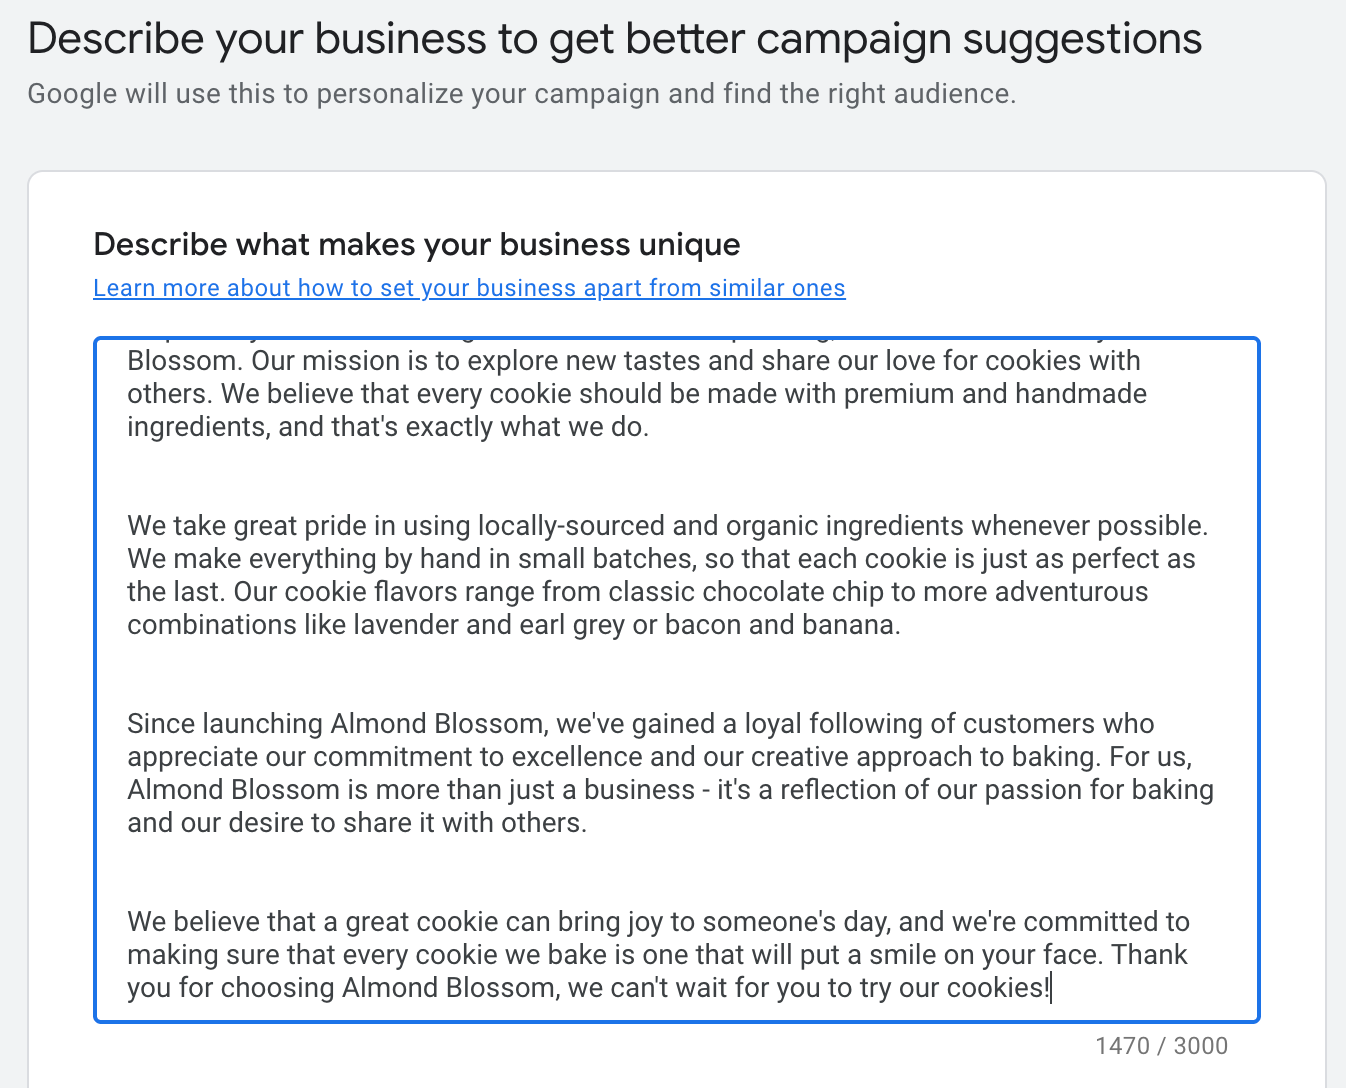
Step 3: Tell them what sets your business apart
In this step, Google asks you to describe your business and tell them what makes your business unique. However, you may see this section already filled out because if you have a business profile associated to your account, Google uses AI to read your website and add a description.
Feel free to add your own, though!
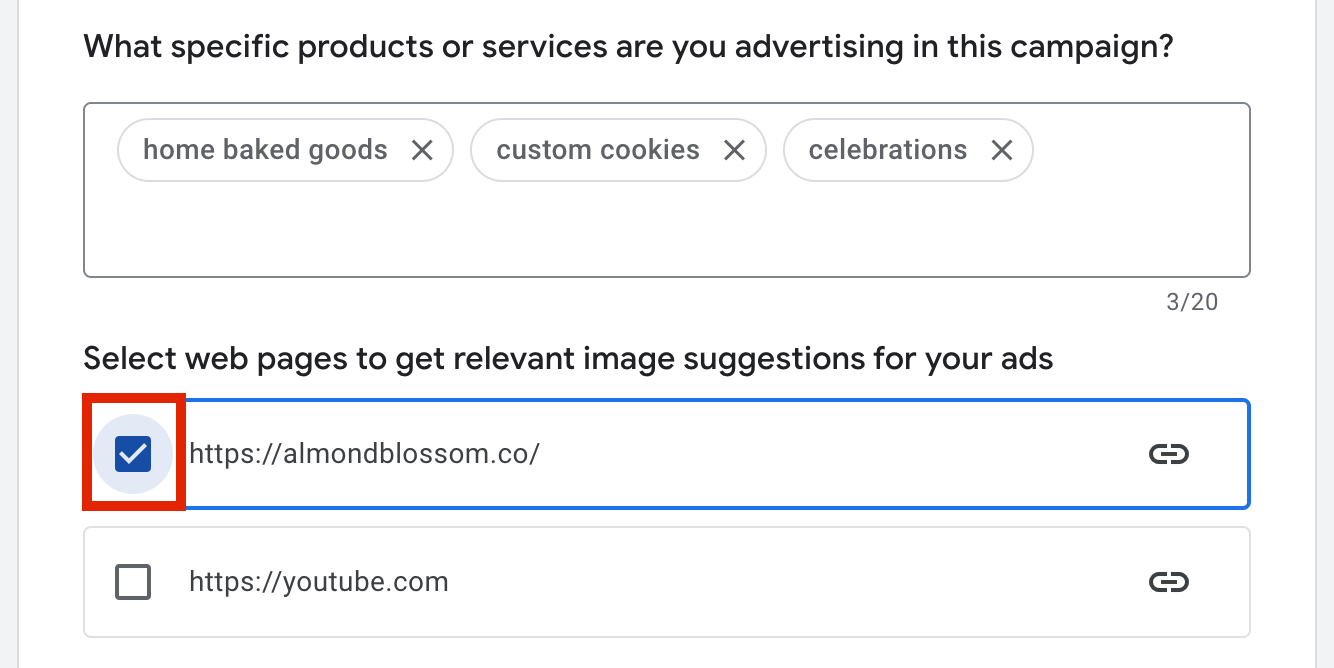
Step 4: Confirm your website
Google will also look for your domain and confirm that it's the correct one. Either choose to check the one that is correct or you an imput your own domain.
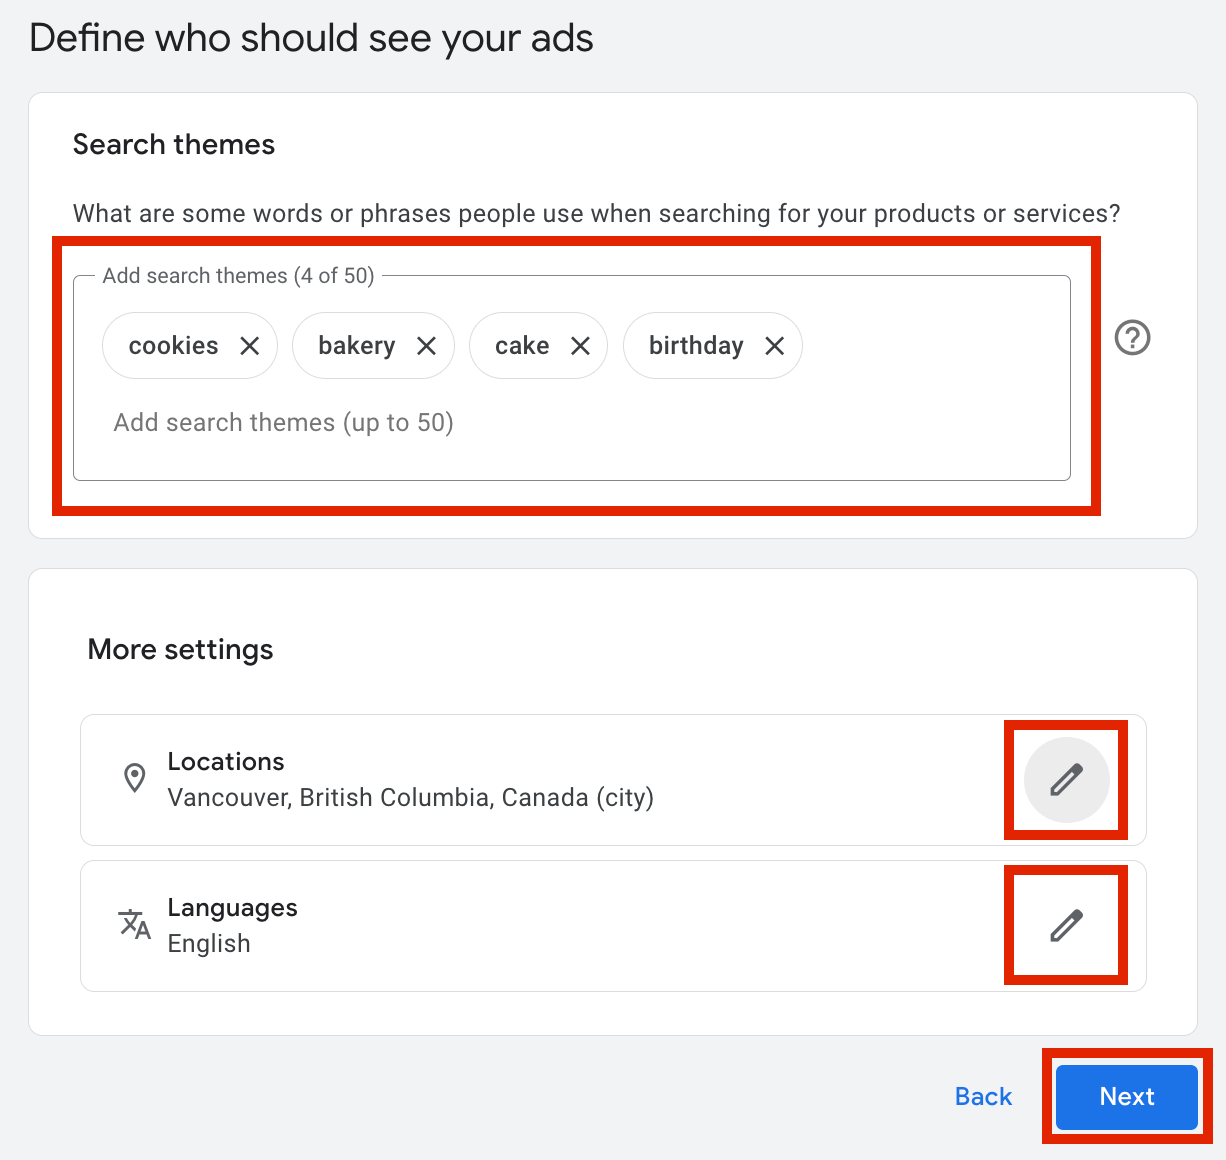
Step 5: Adjust your target audience
In this section you can add some keywords that your audience might use when searching for businesses like yours. Keep these simple and add as many as you like! Some keywords may need to be approved, especially if they're more specific.
Step 6: Review the campaign so far
You can preview how your first campaign is coming together.
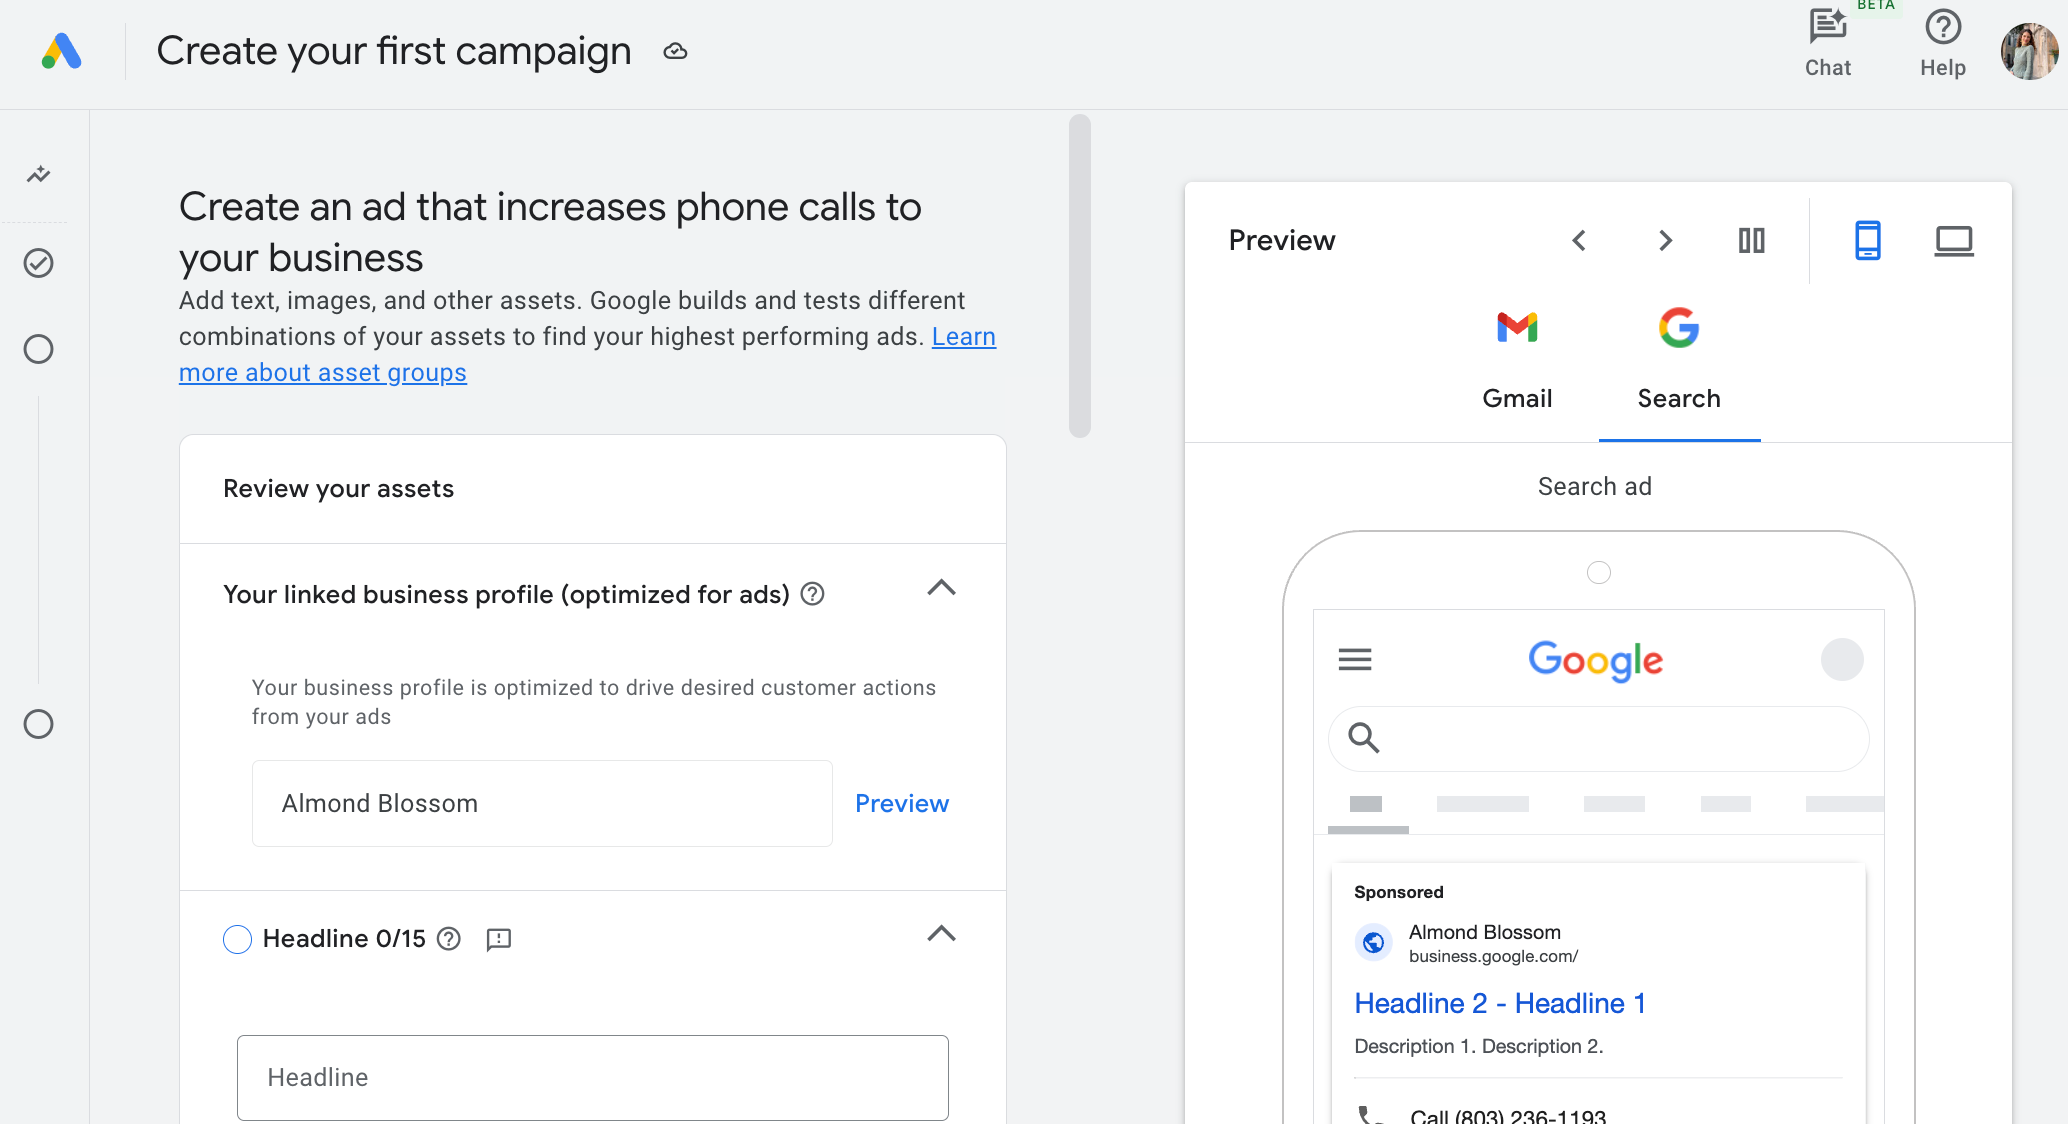
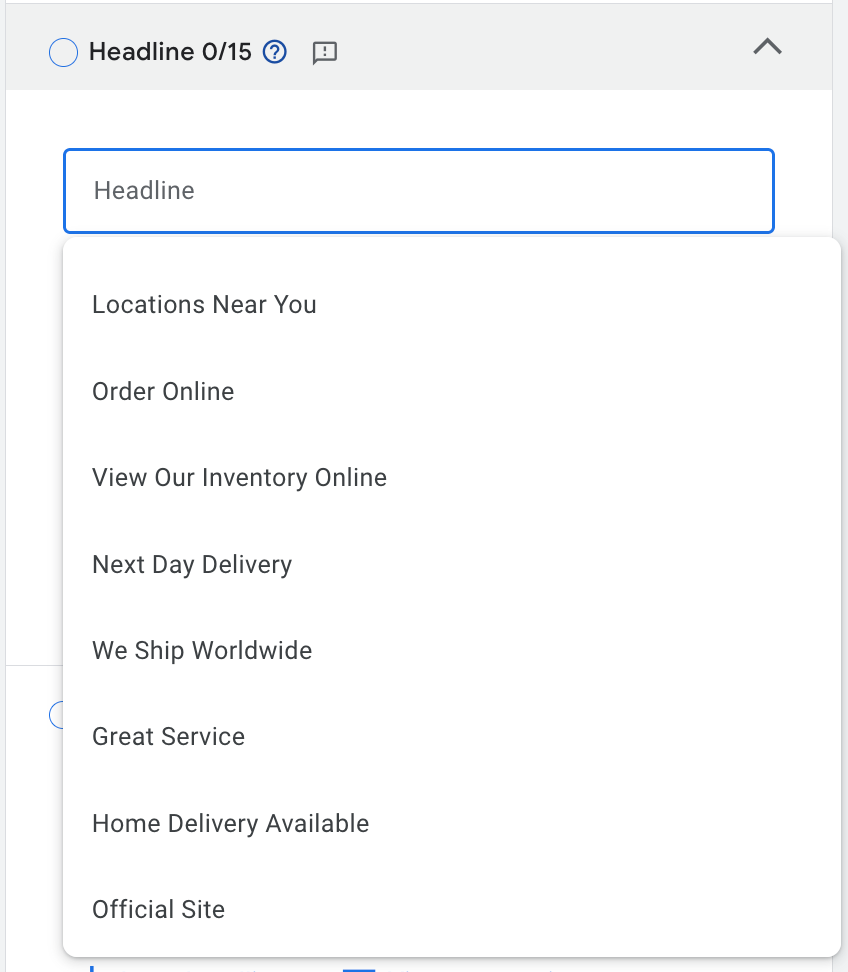
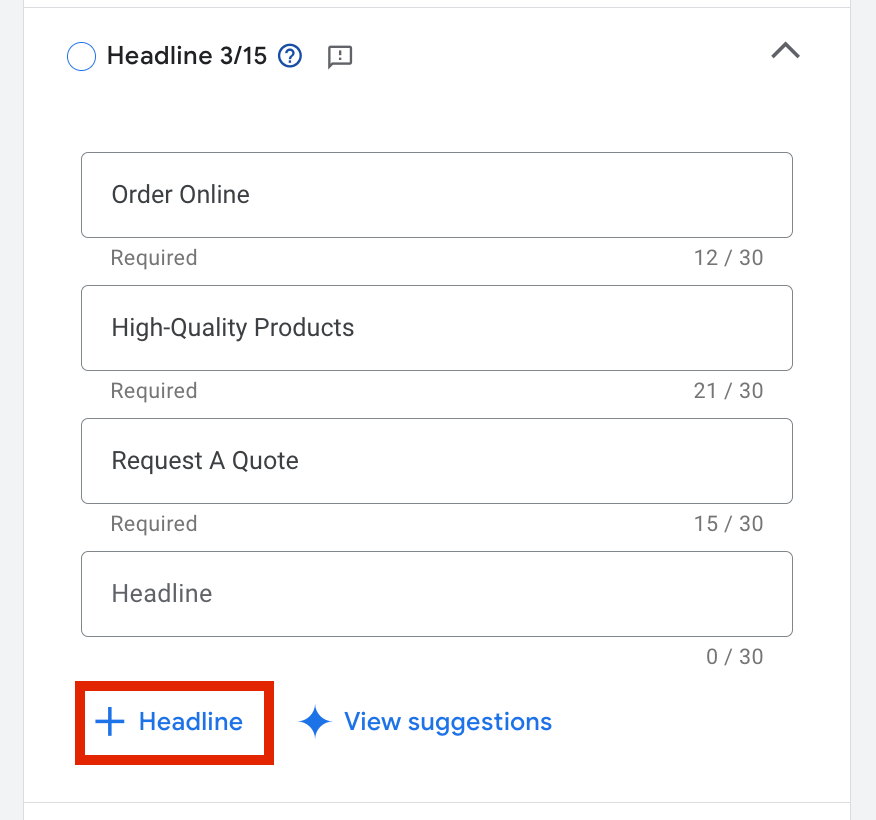
Step 7: Add short and long headlines
Now, you'll start to enter the more important parts of this specific campaign. Each campaign needs a couple of headlines. Think of these as hooks, it's what draws your customer in and gets their attention. You can add up to 15 unique headlines, but you must have at least 3 to continue. These are short and are usually just a phrase. There's a drop-down menu with frequently used headlines if you need a little creative help here.
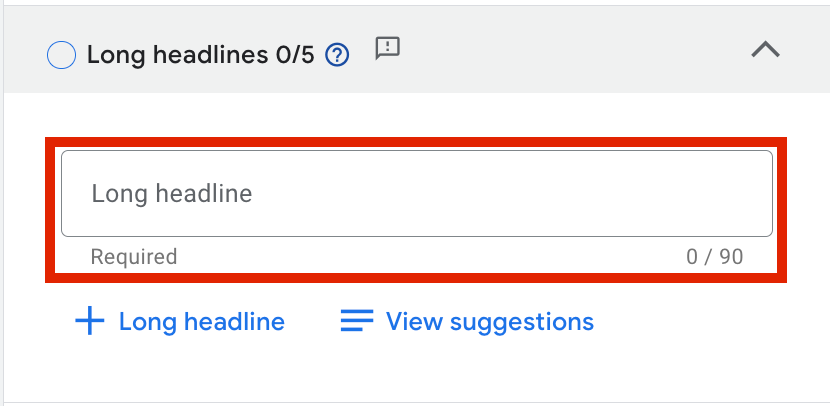
Here you will also add a long headline. You need at least one of these as a requirement, but you can also add more if you want to use them in rotation with your campaign. Again, if you're not sure what to write here, you can choose 'View suggestions' to get an idea on what you could add. Craftify AI can also help you do all of this, and if you're interested in exploring that further, you can see this TUTORIAL on how to use the Campaign tool.
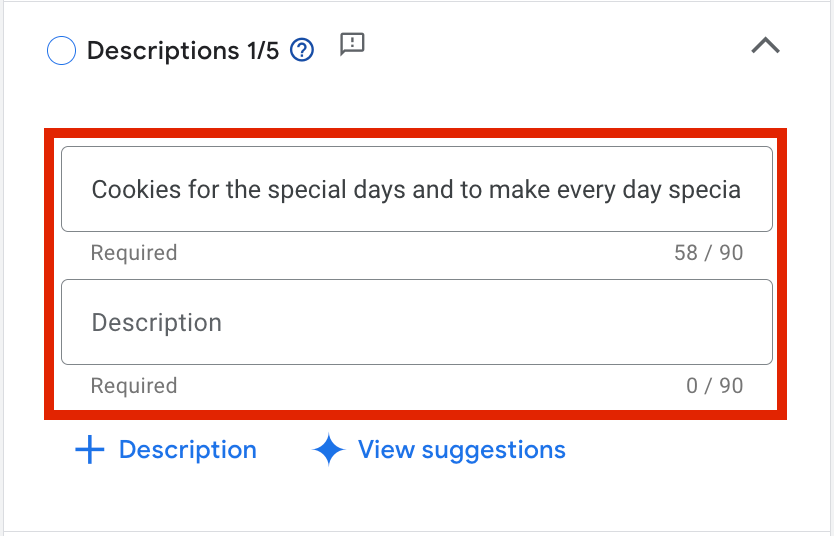
Step 8: Add descriptions
In this section of the Campaign creation you'll dive deeper into what you do as a business and add more details. Here you are required to add at least one description of your business, however you can add up to 5 different descriptions.
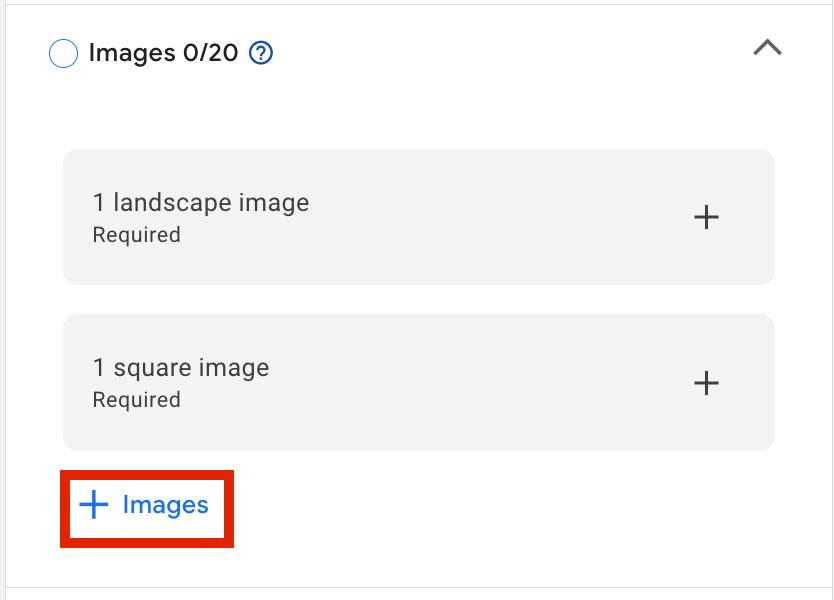
Step 9: Upload images and logos
Having good images for your campaign is crucial, as it helps a potential client immediately see what you do in a visual format. You can upload several images, but at least one must be in a landscape format, and one other in square format.
Now upload your logo! If you don't have yours on hand, Google can search your website and integrate the one it scrapes off of your website directly.

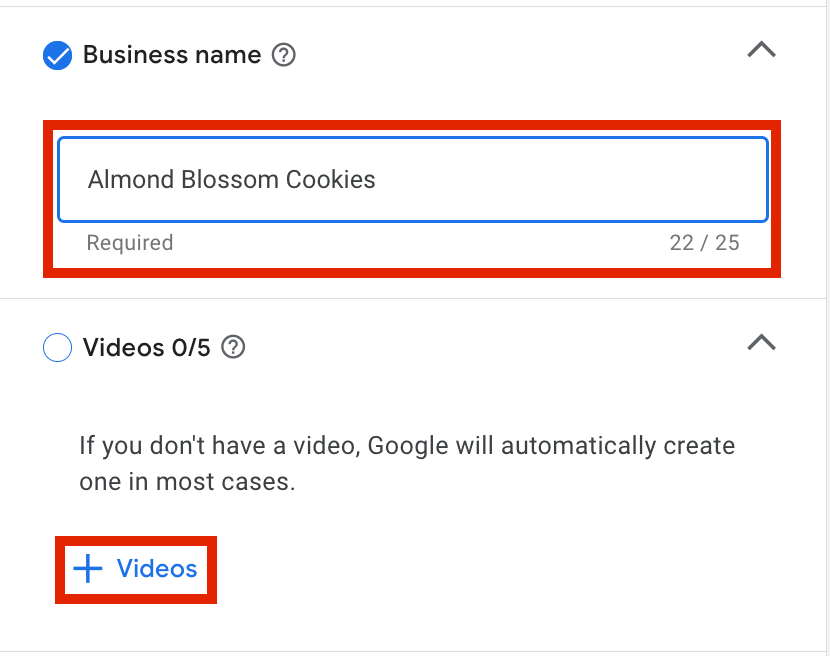
Step 10: Confirm your business name
Since Google already knows your website, it also knows your business name. However, it's important that you review it to make sure that it is correct here before going forward.
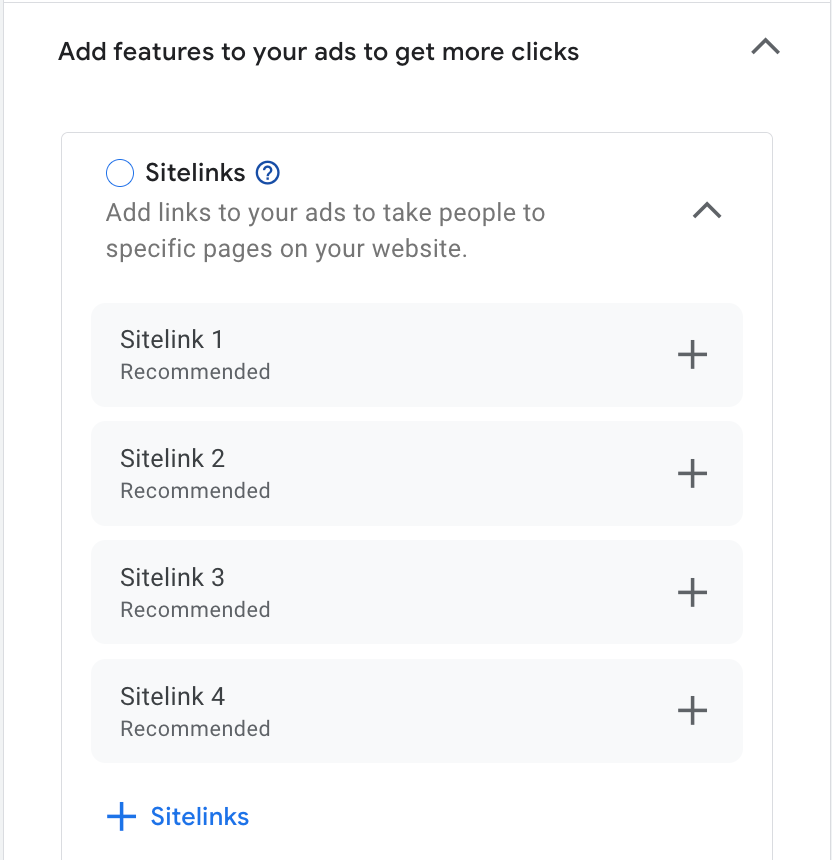
Step 11: Add links to your campaign
Campaigns with links get more clicks! You want your campaign to point towards how a client can book a session, or buy your products, so here is a great place to add all of those links. It is not mandatory that you add a sitelink, however it's highly recommended! You can link to anywhere, but here at Craftify AI we suggest that you link to your main website, any products or services you're promoting, and your contact page.
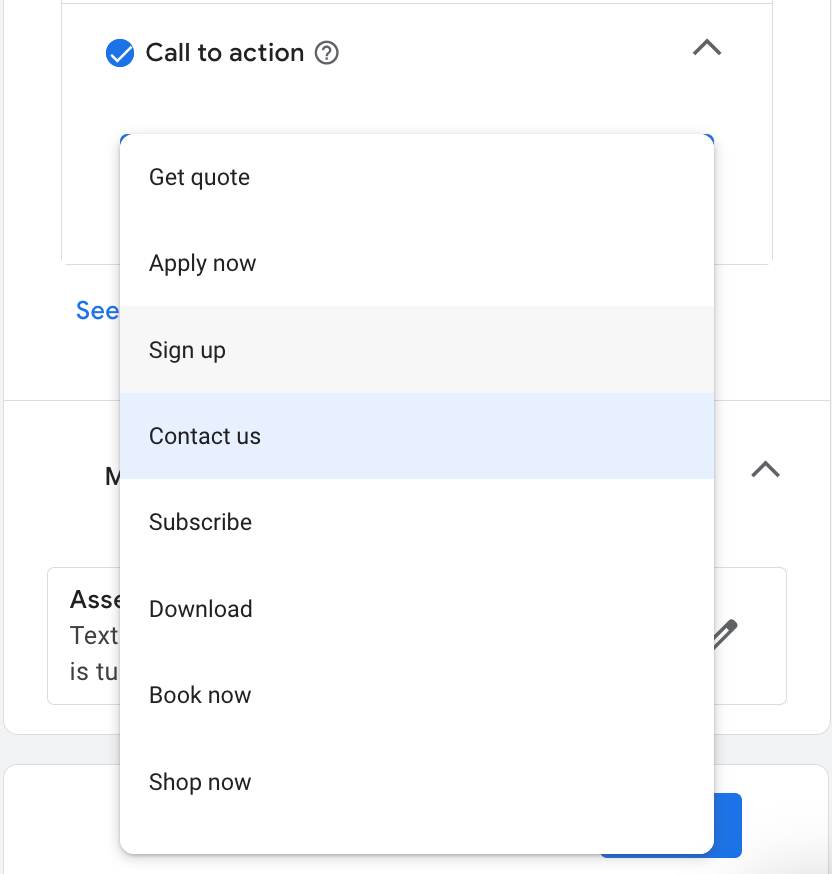
Step 12: Choose your Call to Action
The Call to Action is what pushes the potential client to do something and interact with your brand. Here you will find a drop-down menu with many different choices to choose from for your call to action. You can choose from one of these or write in your own.
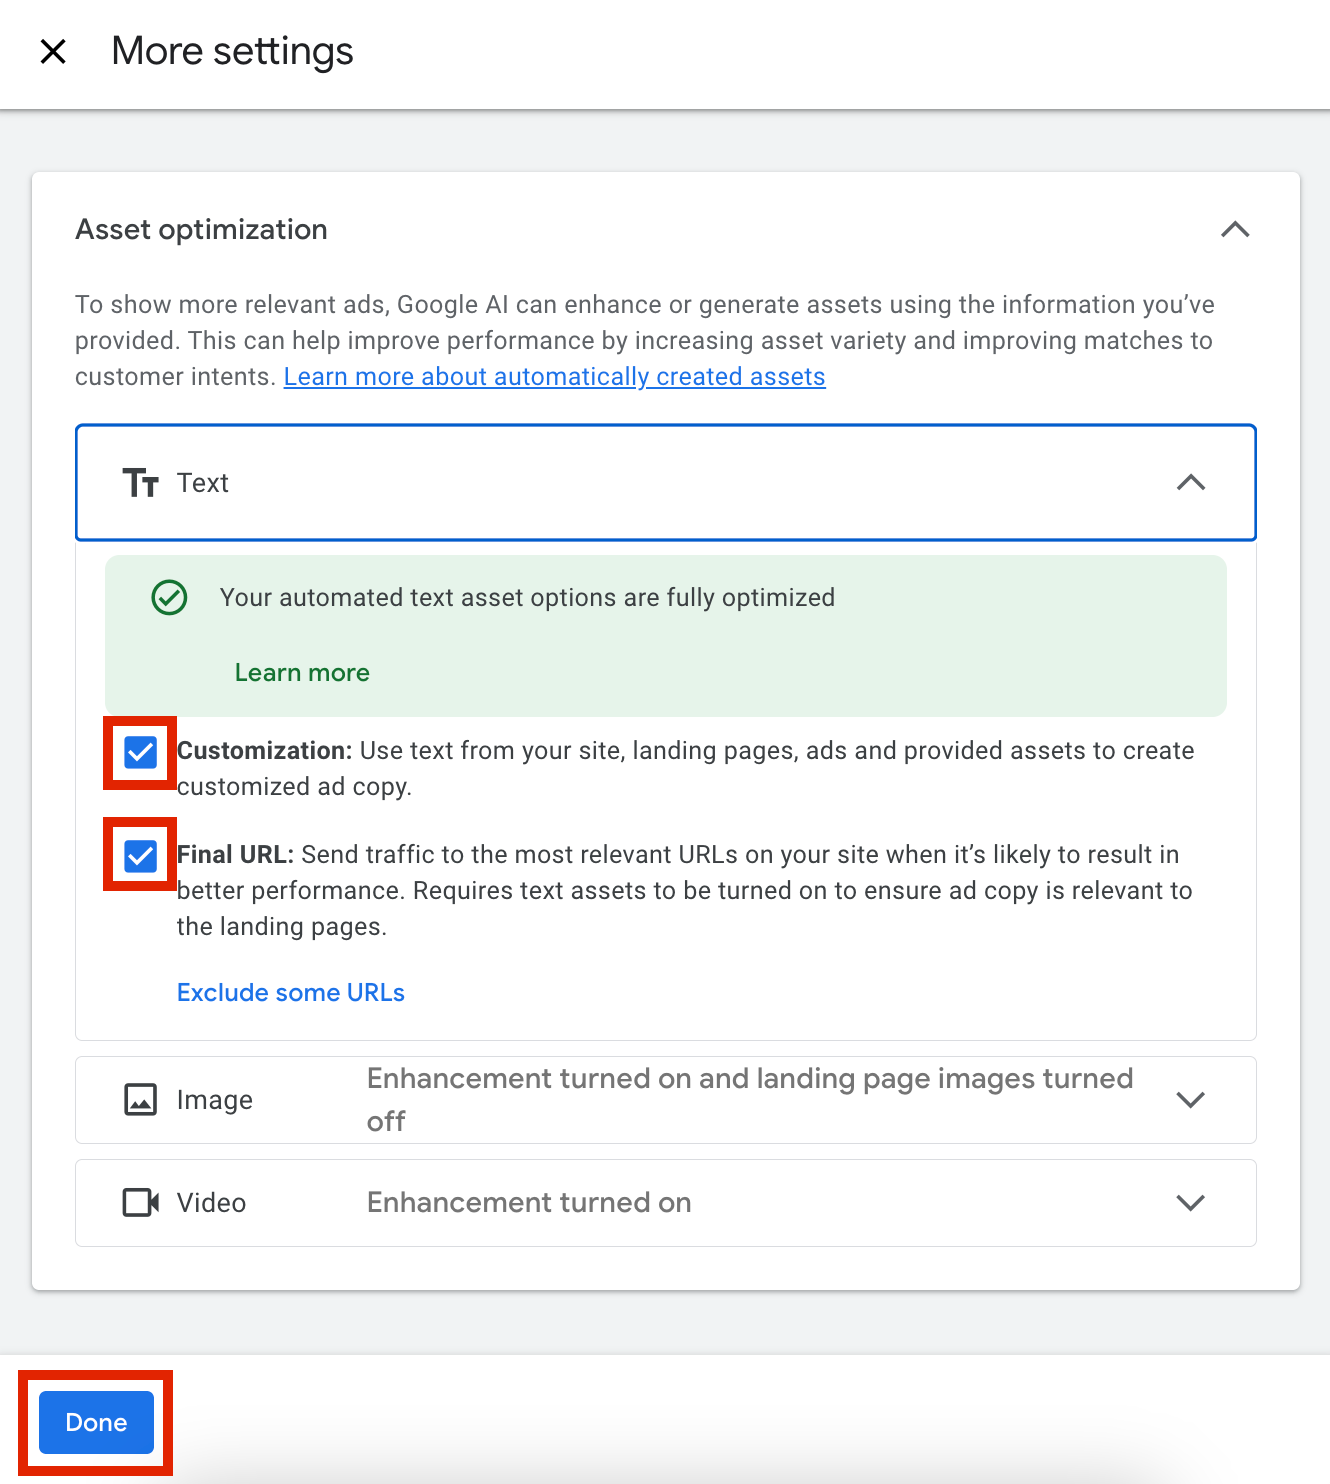
Optional Step: More Settings
Here you can allow Google to optimise your campaigns by pulling information directly from your website. This means you can choose to give it access to your images, text and much more that you have published on your website, and use it within your Google campaigns. This is totally optional and can but customised to your preferences.
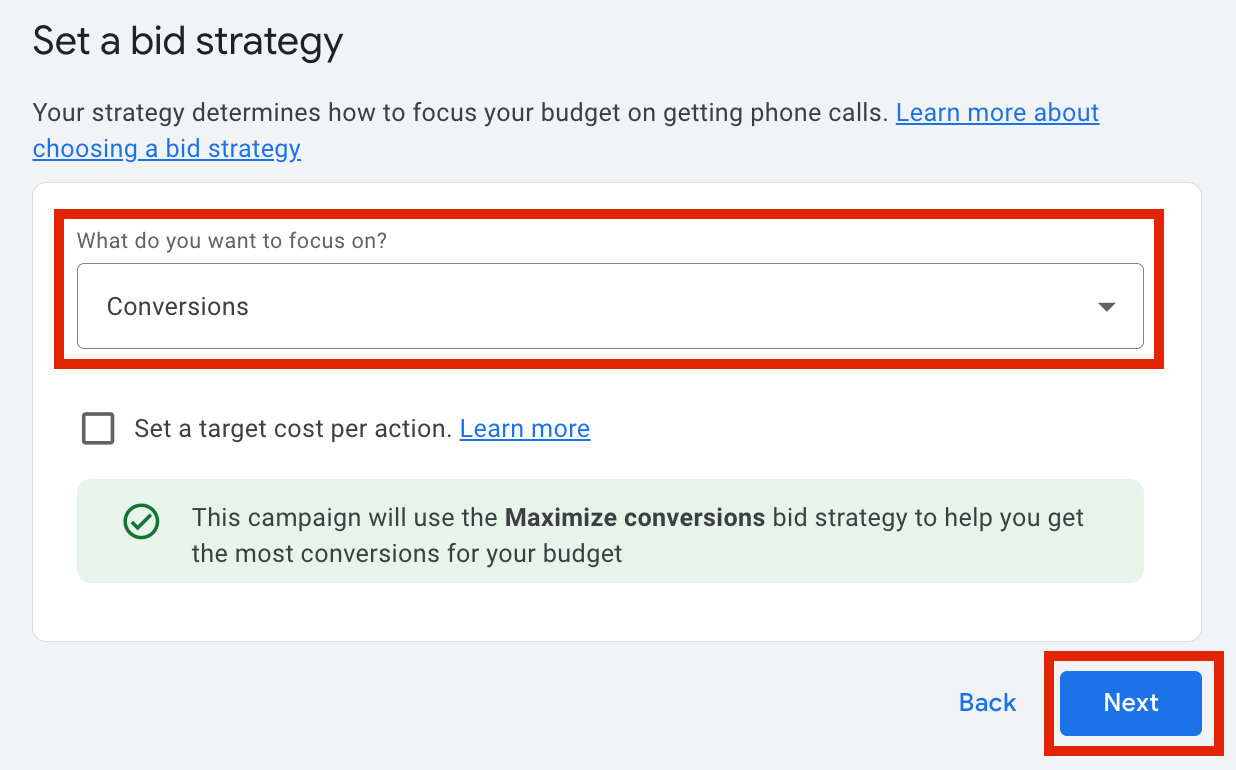
Step 13: Understand and set up your bid strategy
What do you want to achieve with your campaign? Do you want to grow your email newsletter, make conversions, or promote a sale? Here you can choose from many different aspects to focus your campaign. This helps Google point your potential clients in the right direction.
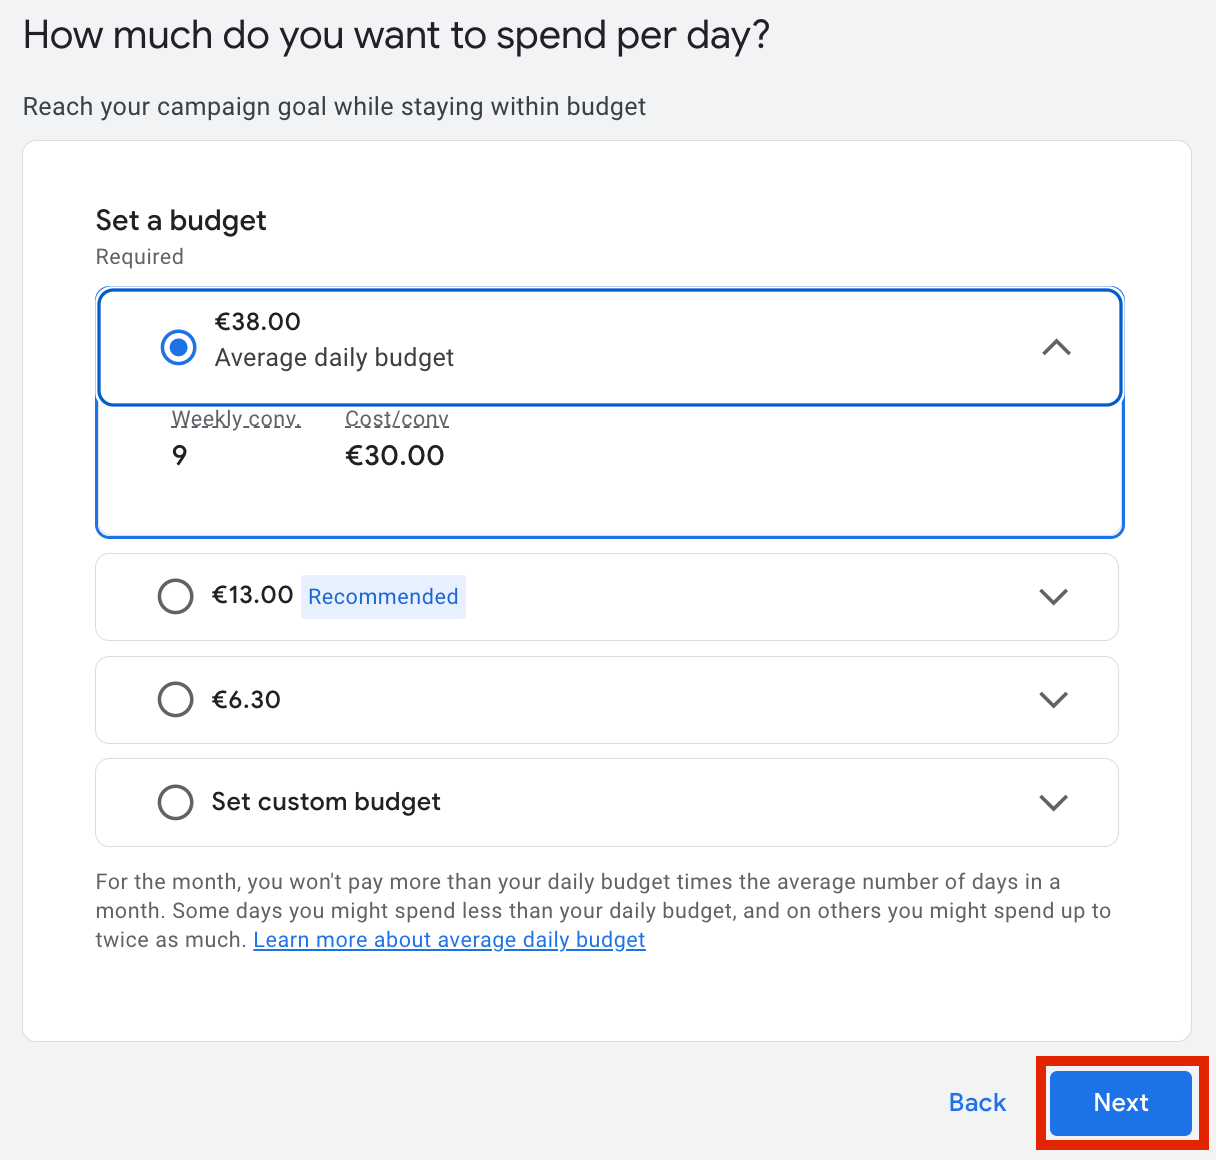
Step 14: Budget and payment details
Setting up a realistic daily budget is important when running your campaigns. Consider the maximum you want to spend, then divide that for the days you want to run the campaign and there you'll have your daily spend. Google will show you some average spends that others are spending for certain level of results. As you can see there is an average daily budget, however you can customise your budget by choosing the last option and entering the number that works best for you and your budget.
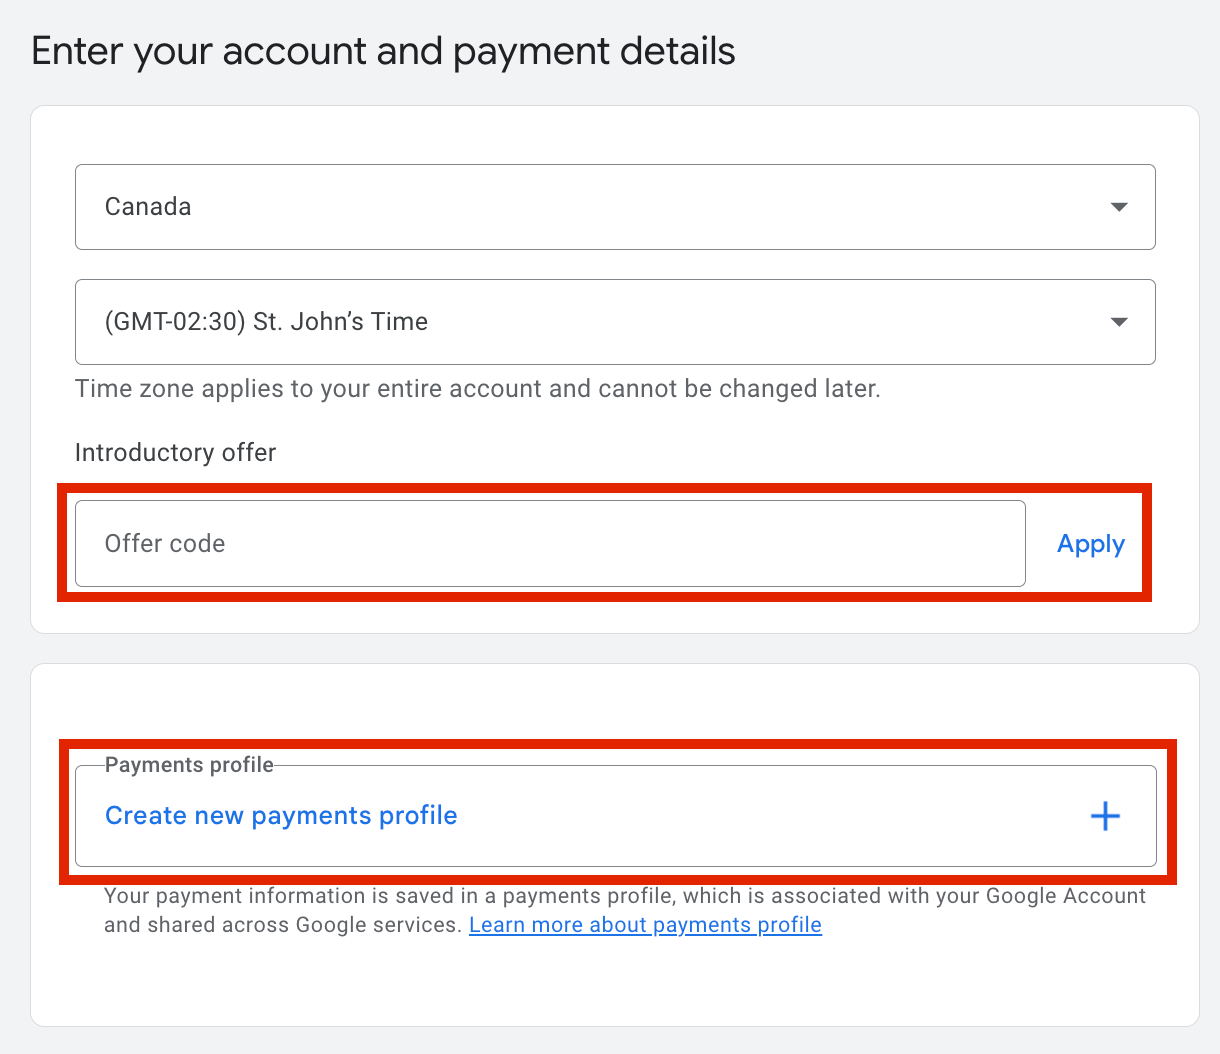
Now you'll be prompted to set up your payment details so that Google can utilize your daily budget on your campaign. Be sure to choose your operating country and time zone. If you have an offer code, enter that here to get a discount on your campaign spend!
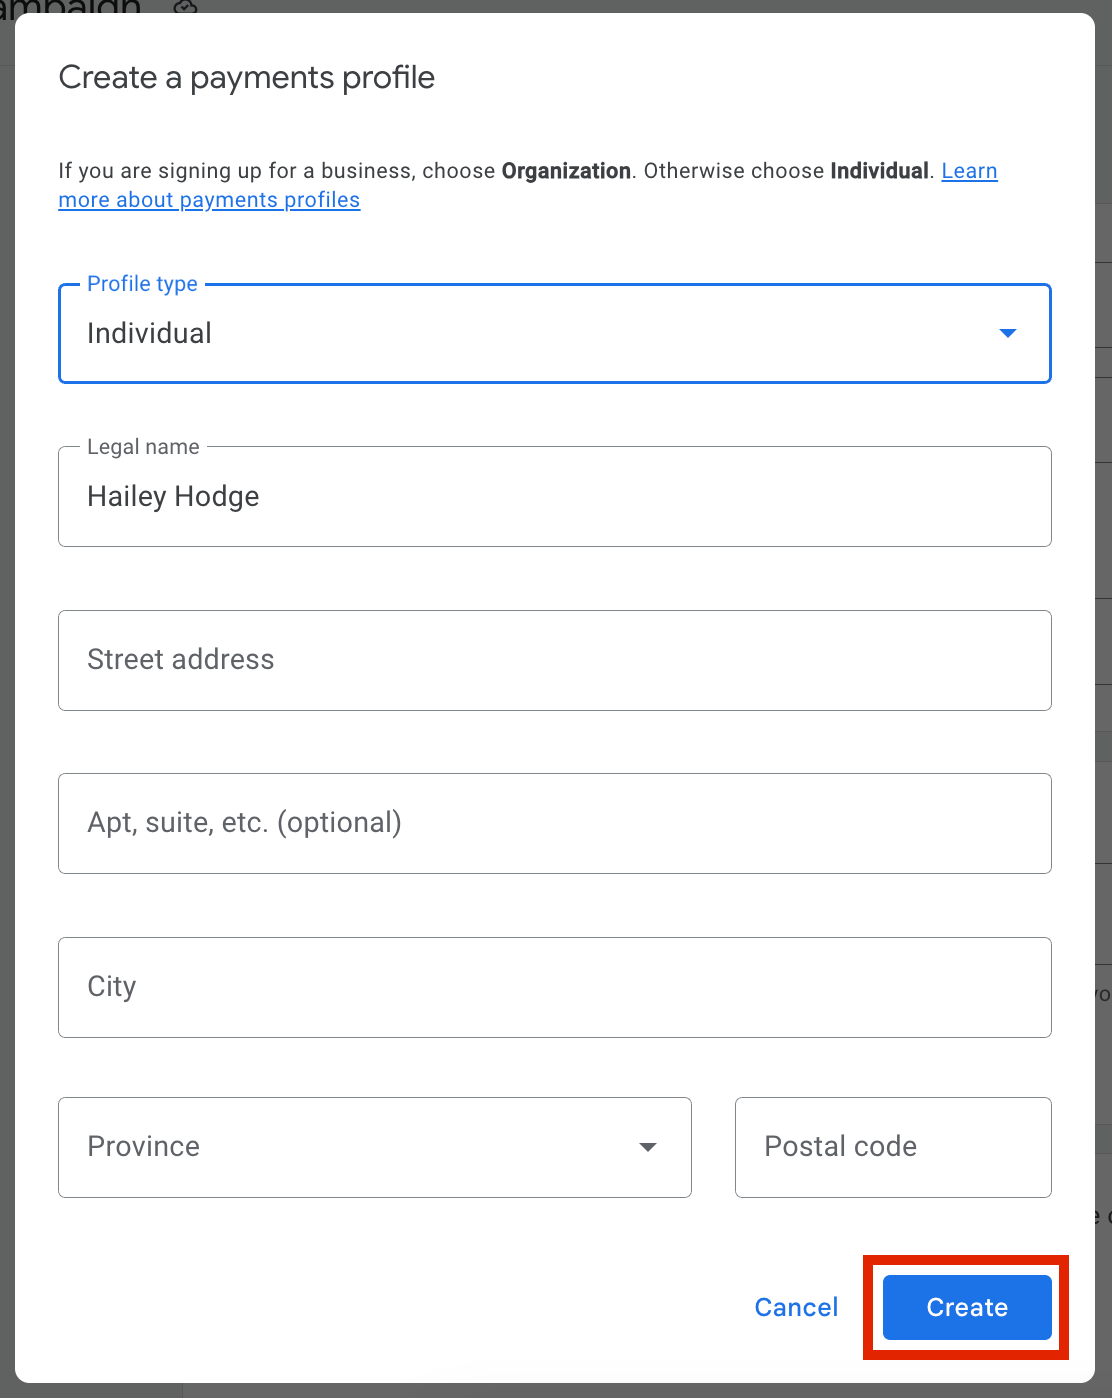
Then you'll choose 'create new payments profile' to get the rest set up.
Add all of the appropriate information here and choose 'Create' to finish up your set up process.
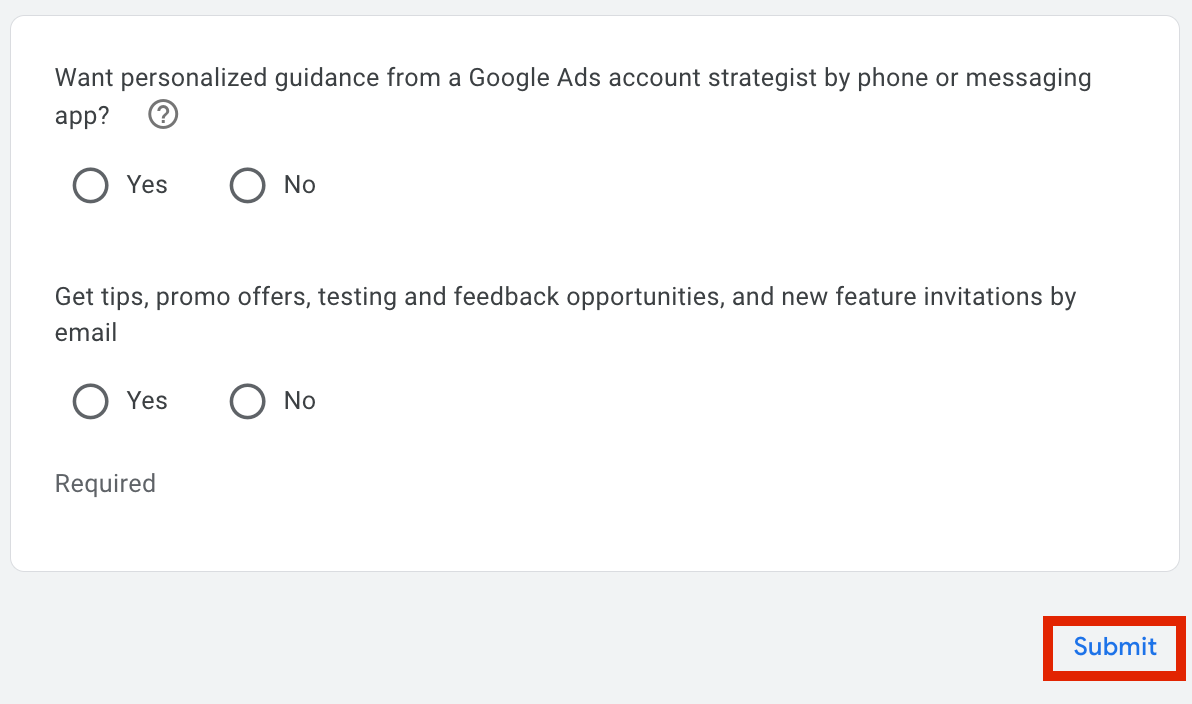
Step 15: Submit your profile application for a Google Ads account
You'll be given a couple of questions that are required that you answer, then choose 'Submit' to finish your Google Ad account.
Now you're ready to get started with your campaigns! Google does a good job by onboarding you while also showing you how to set up a campaign so that you can get started immediately with your Google Ads!
When making future campaigns, Craftify AI can help you build all of the descriptions and more to make the best of your Google Ads experience.
Now it's time to set up your Google Ad campaigns! HERE is a tutorial on how to get started.