Domain Verification and Email Settings Tutorial
- Domain Verification Tutorial
- Step 1: Sign into your Craftify AI account and find your settings
- Step 2: Sign in to your Domain Host
- Step 3: Head back to Craftify AI Email Settings to set up your Domain
- Step 4: Copy over the DNS settings
- Step 5: Verify your domain
- Now it's time to scroll up and set up your Email Settings!
- How to set up your Email Settings in Craftify AI
- Step 1: Add Sender Email
- Step 2: Add Sender Name
- Step 3: Add or edit the Reply-to email
- Step 4: Add your Email Signature
Domain Verification Tutorial
One of the most important integrations for your business while using Craftify AI is the Domain Verification. Once you've set this up you can start sending out your marketing objectives with ease and directly through Craftify AI!
Follow along to see how you can set up yours with ease.
This tutorial is made with a few screenshots from the NameCheap domain hosting site. Some small details in this tutorial may differ depending on which domain hosting service you use. However most of them are very similar and easy to find the same settings that we provide here.
Step 1: Sign into your Craftify AI account and find your settings
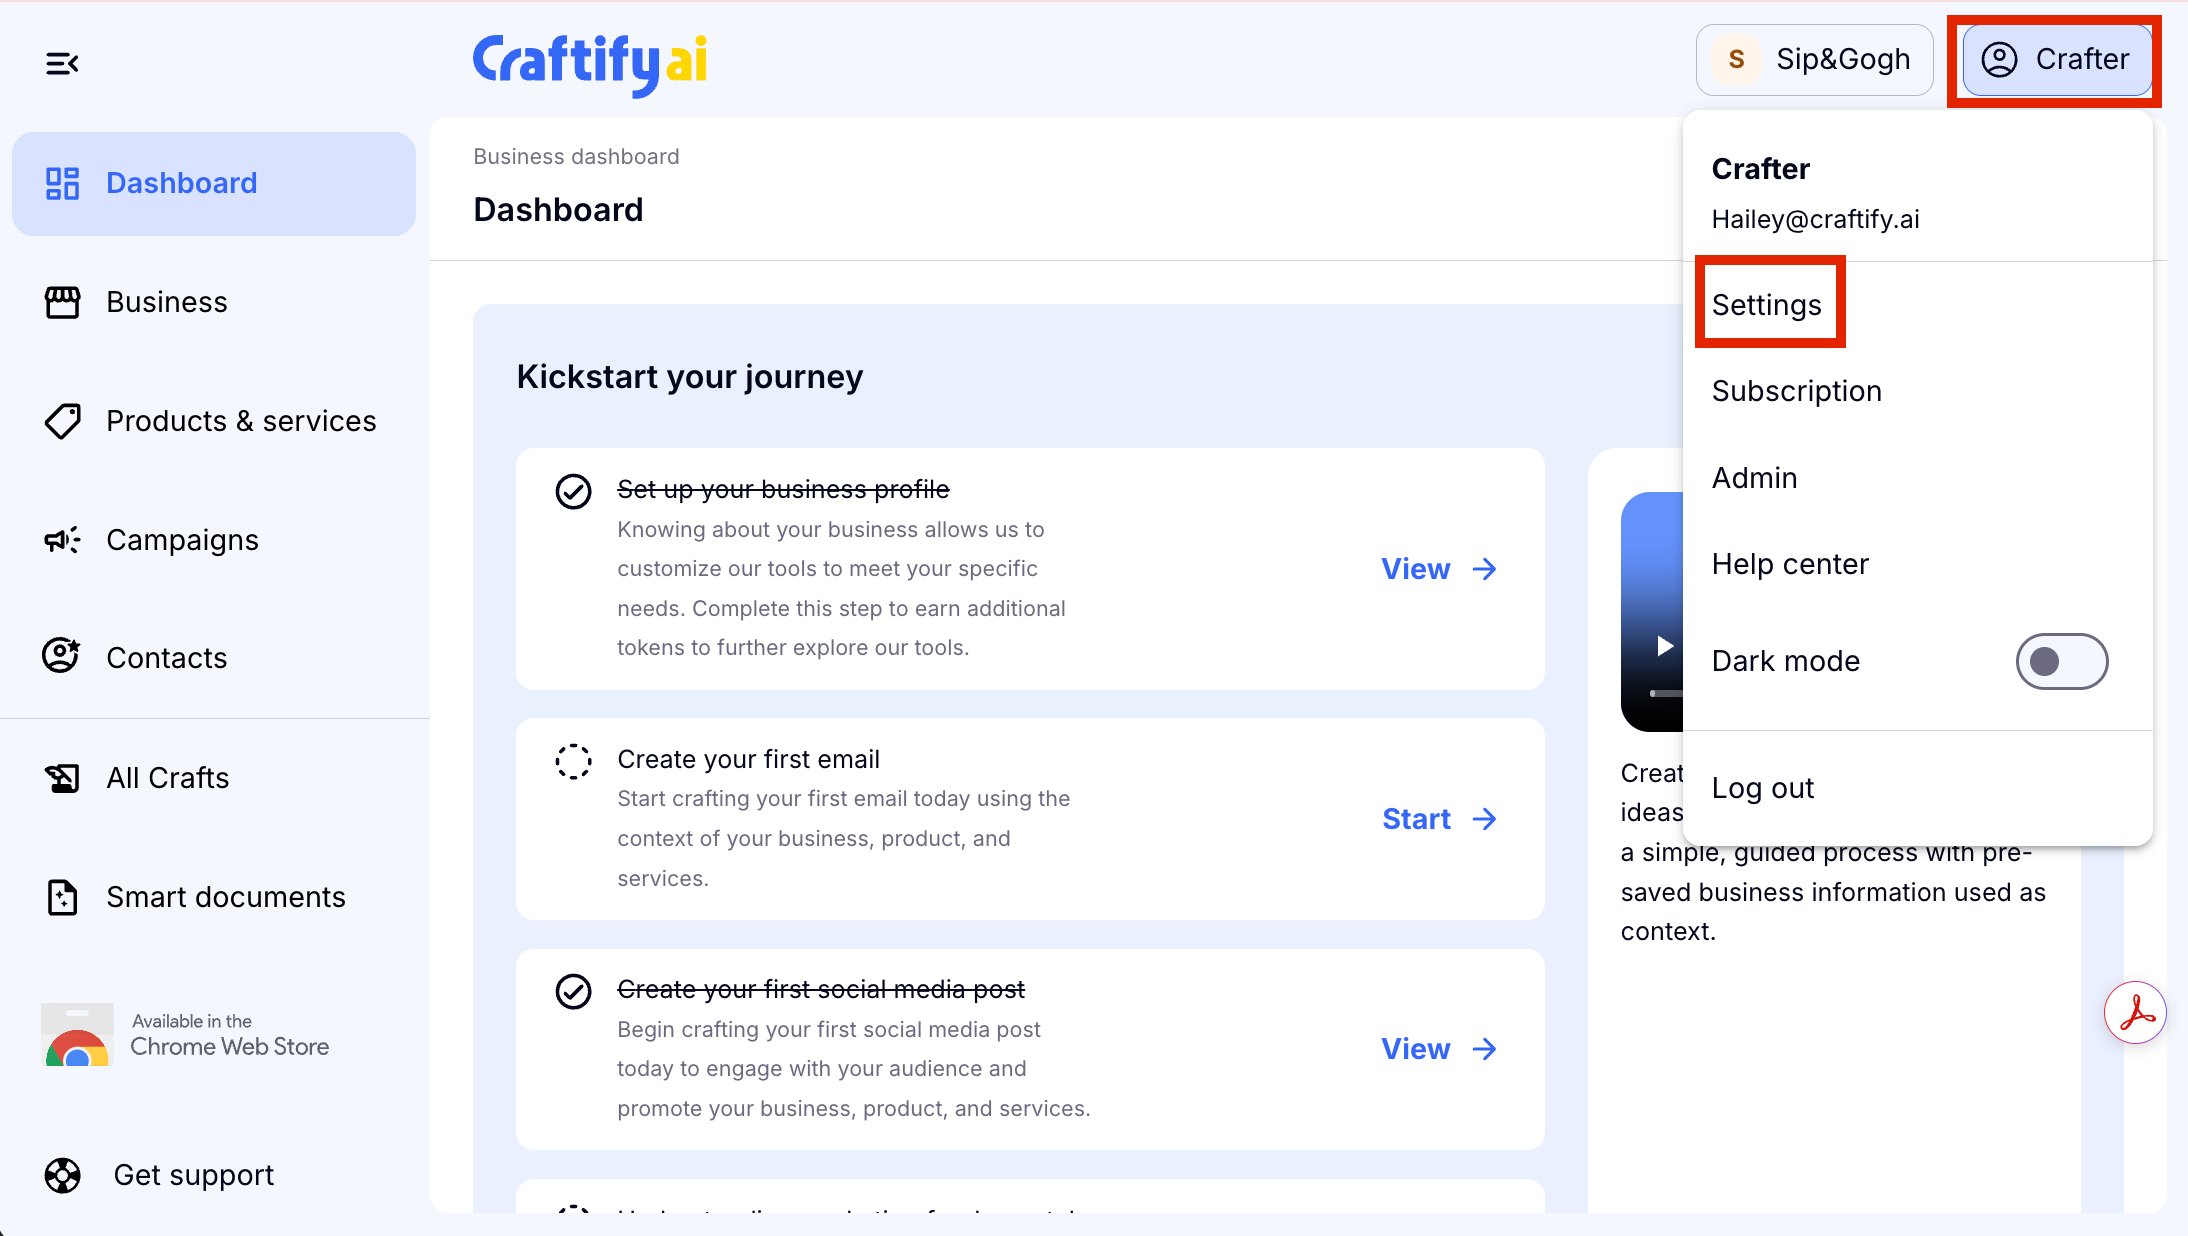
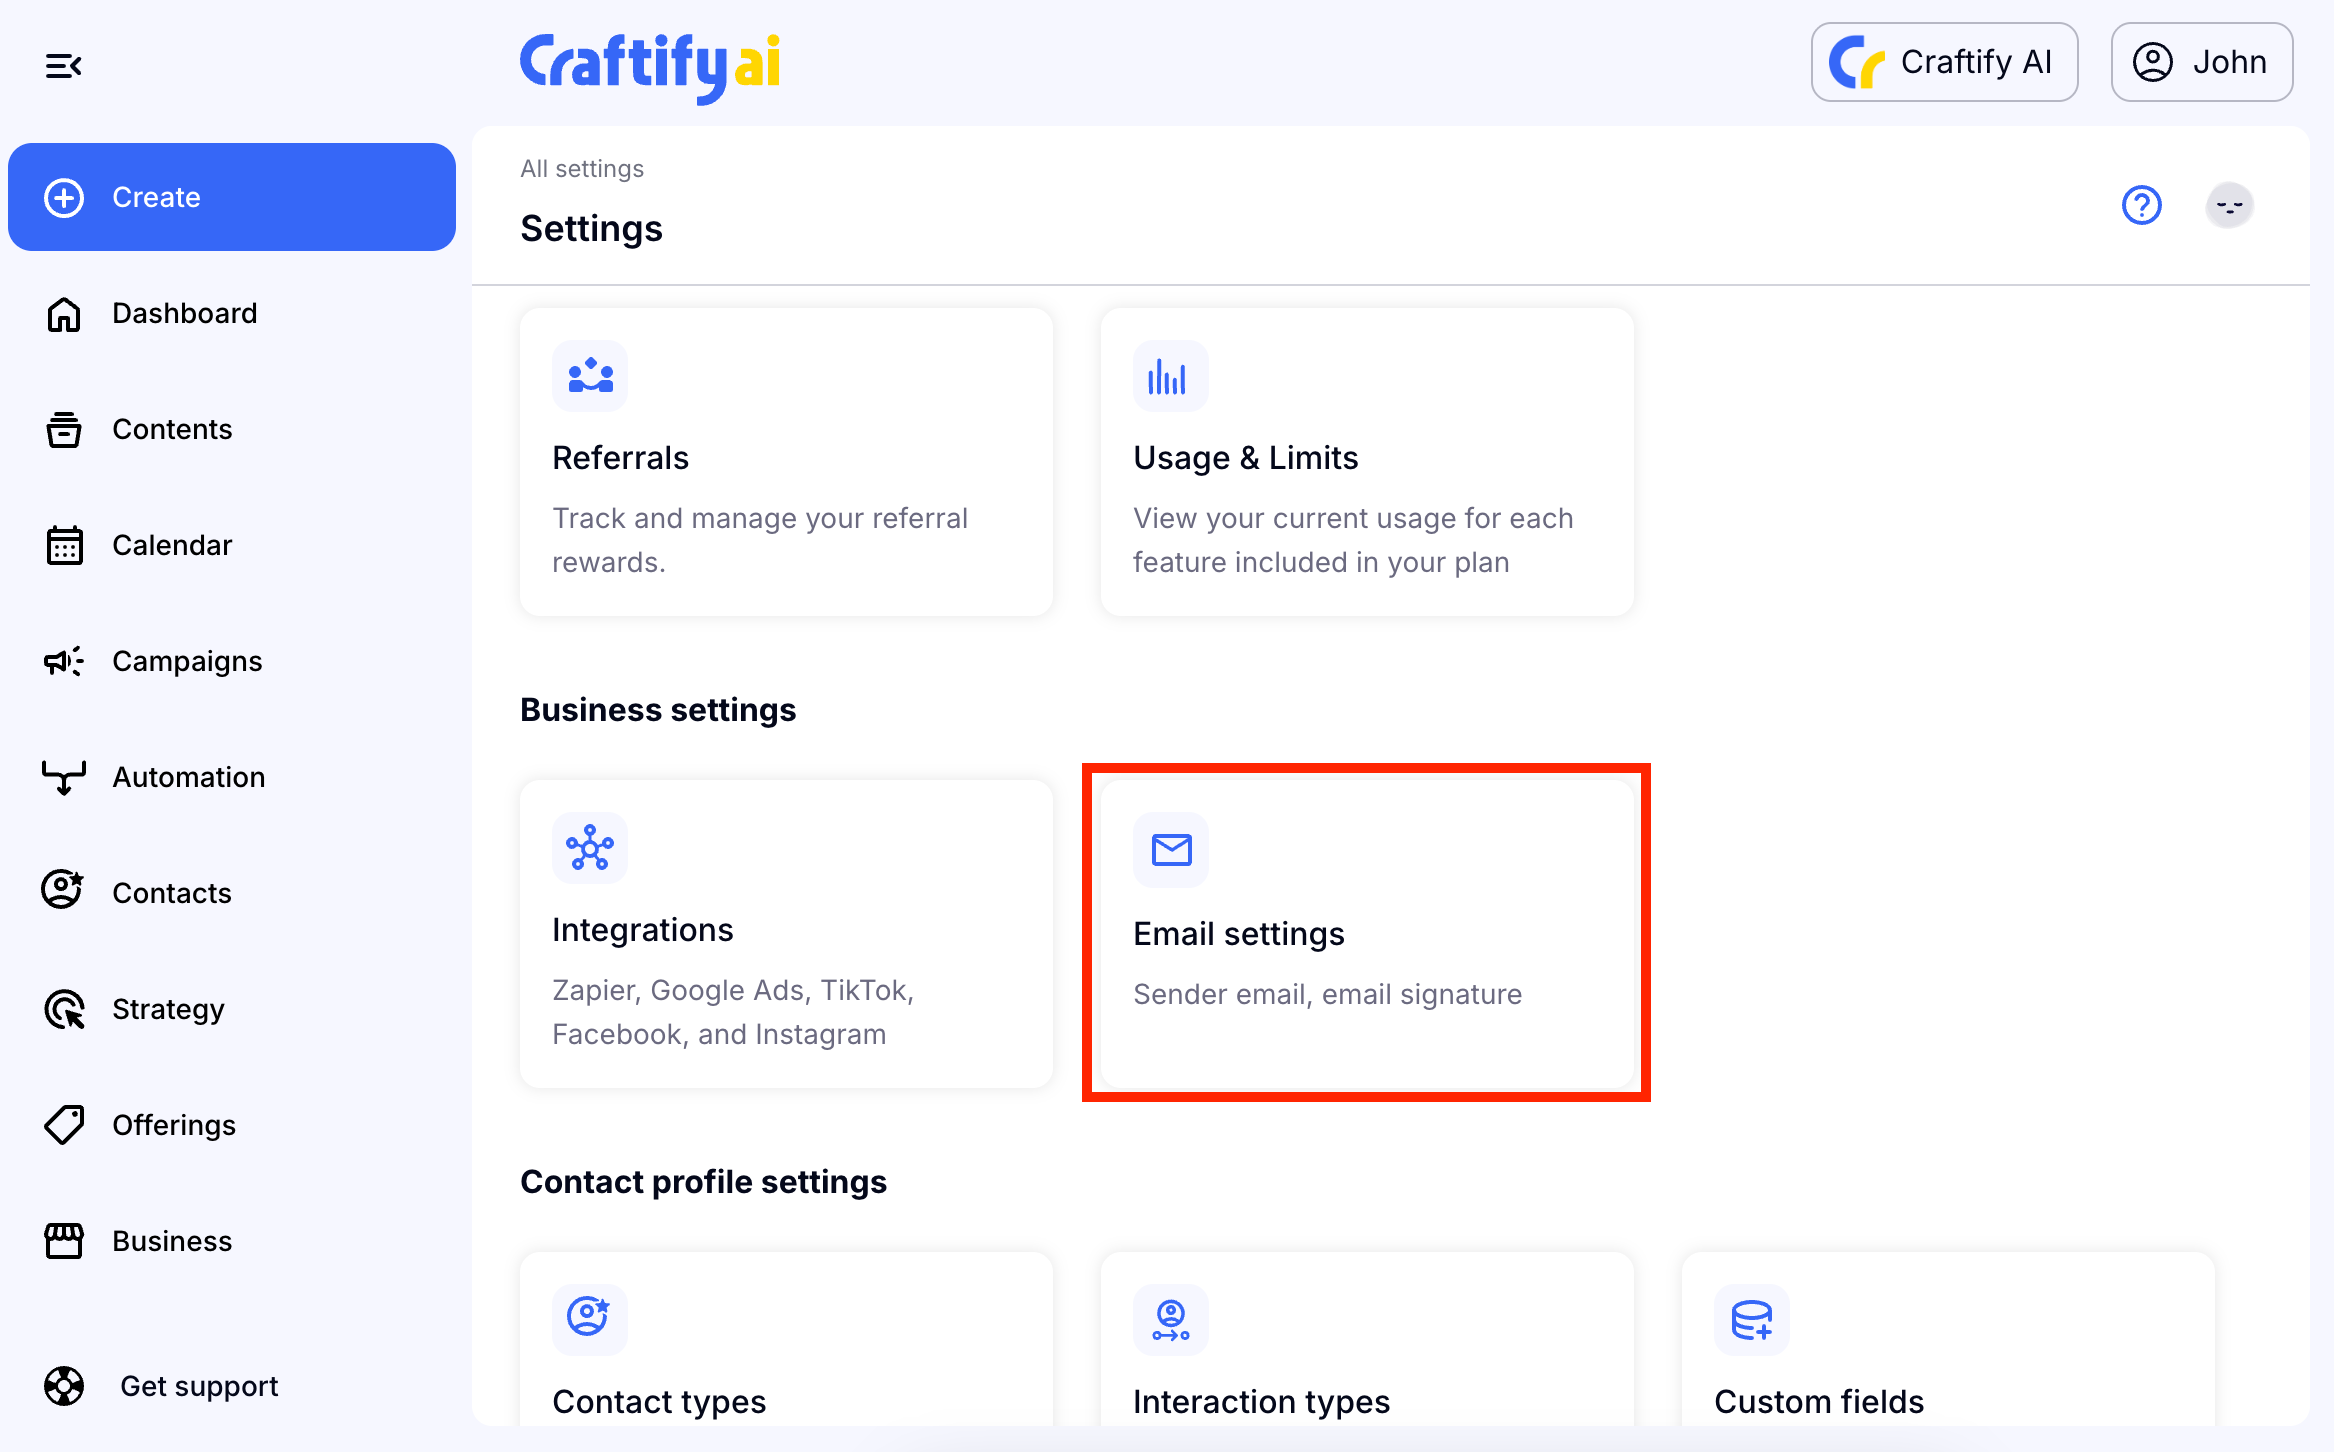
Once you've located your settings, scroll down to the 'Business Settings' section and choose 'Email Settings.'
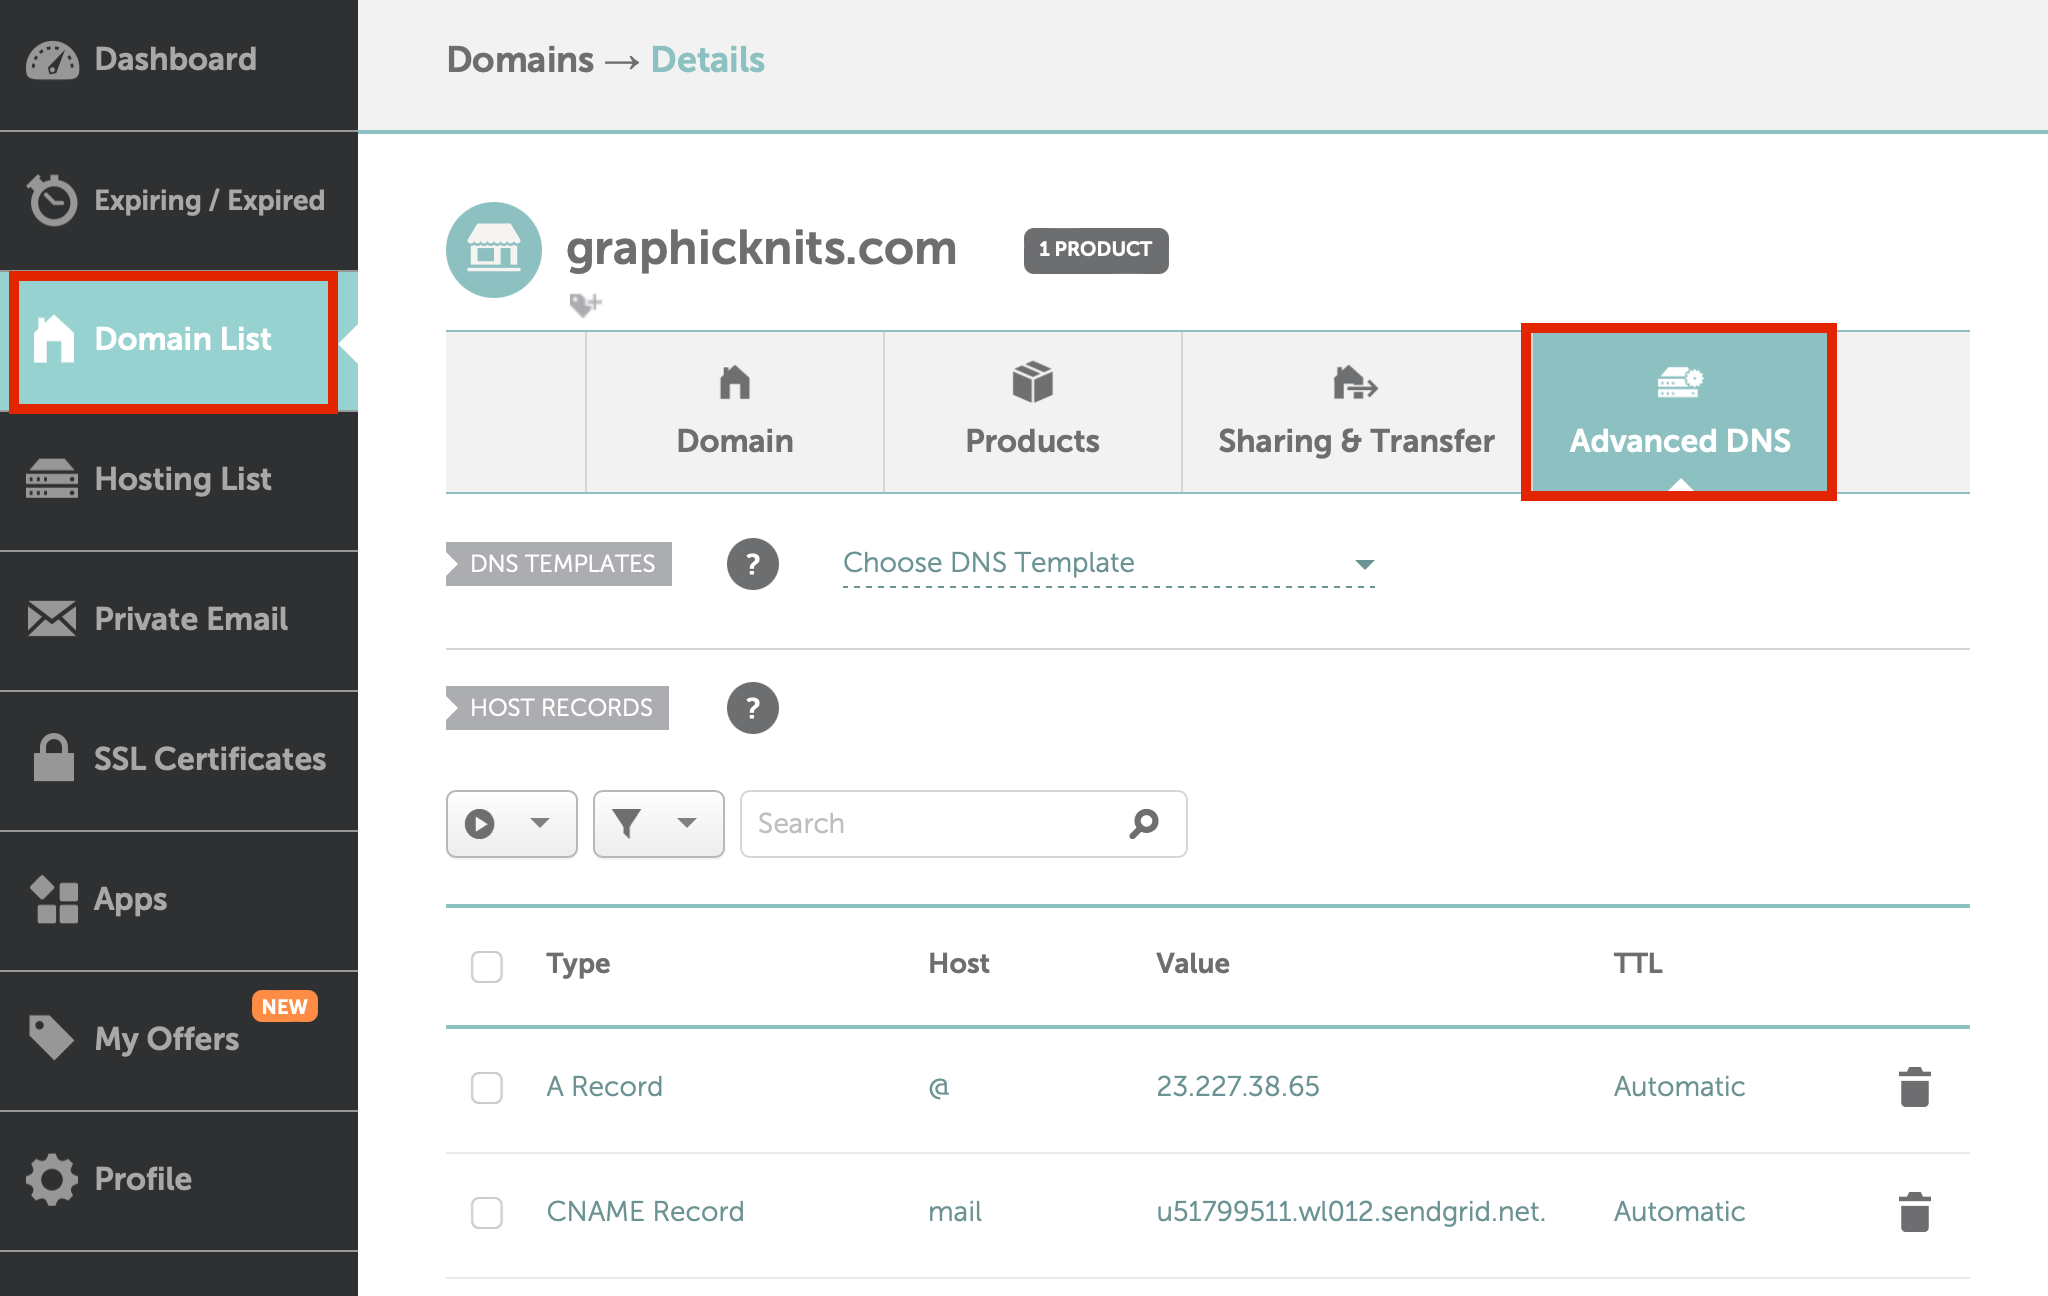
Step 2: Sign in to your Domain Host
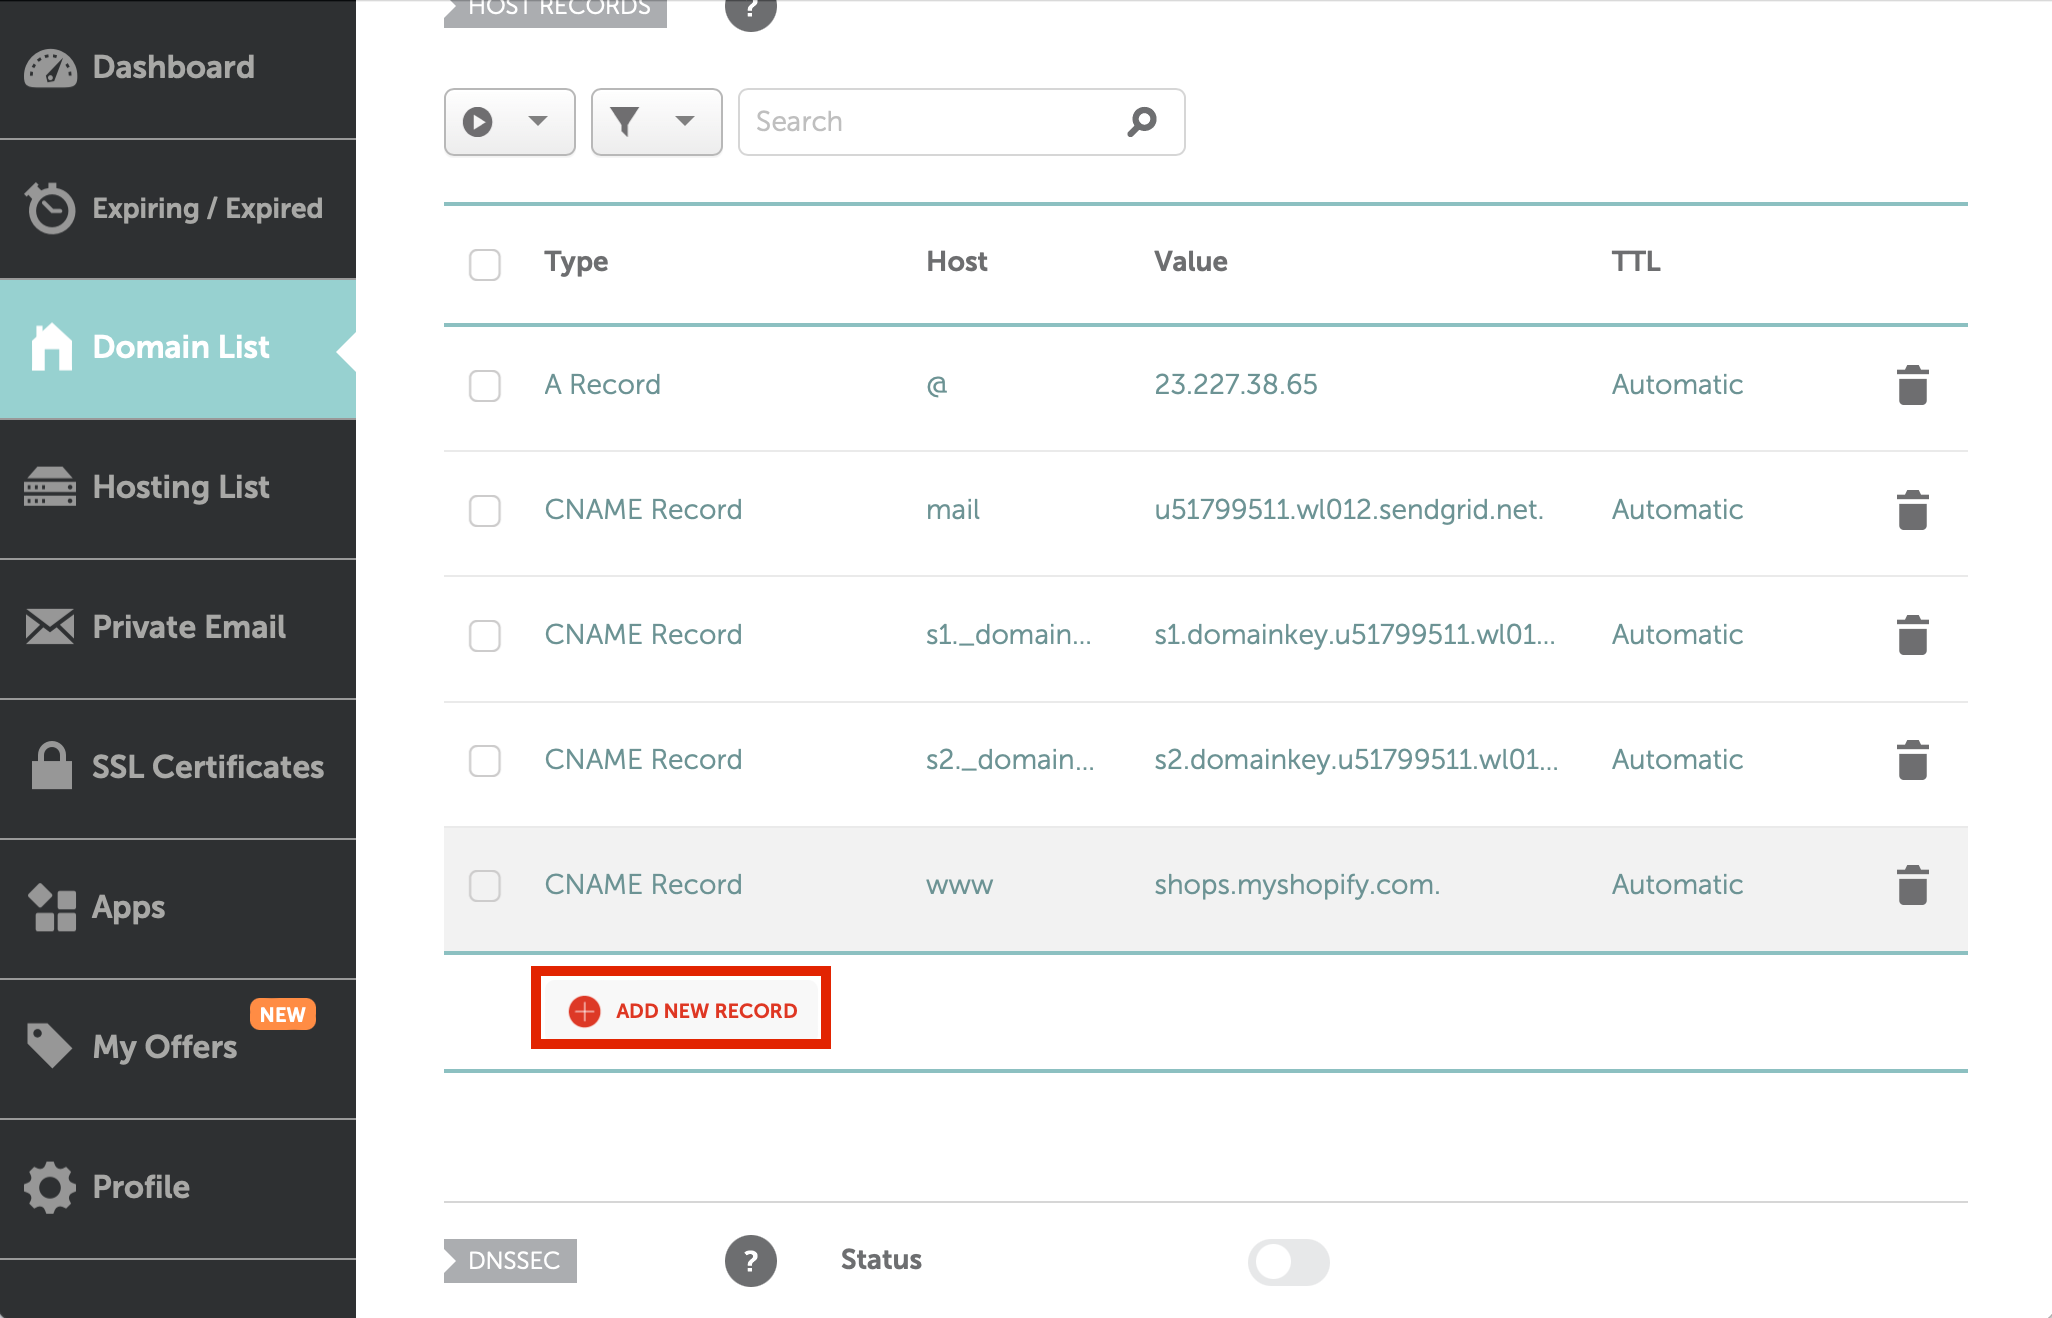
Once you've signed in, head over to your Domain List, choose the domain that you want to connect to Craftify AI, and then choose 'Advanced DNS' settings.
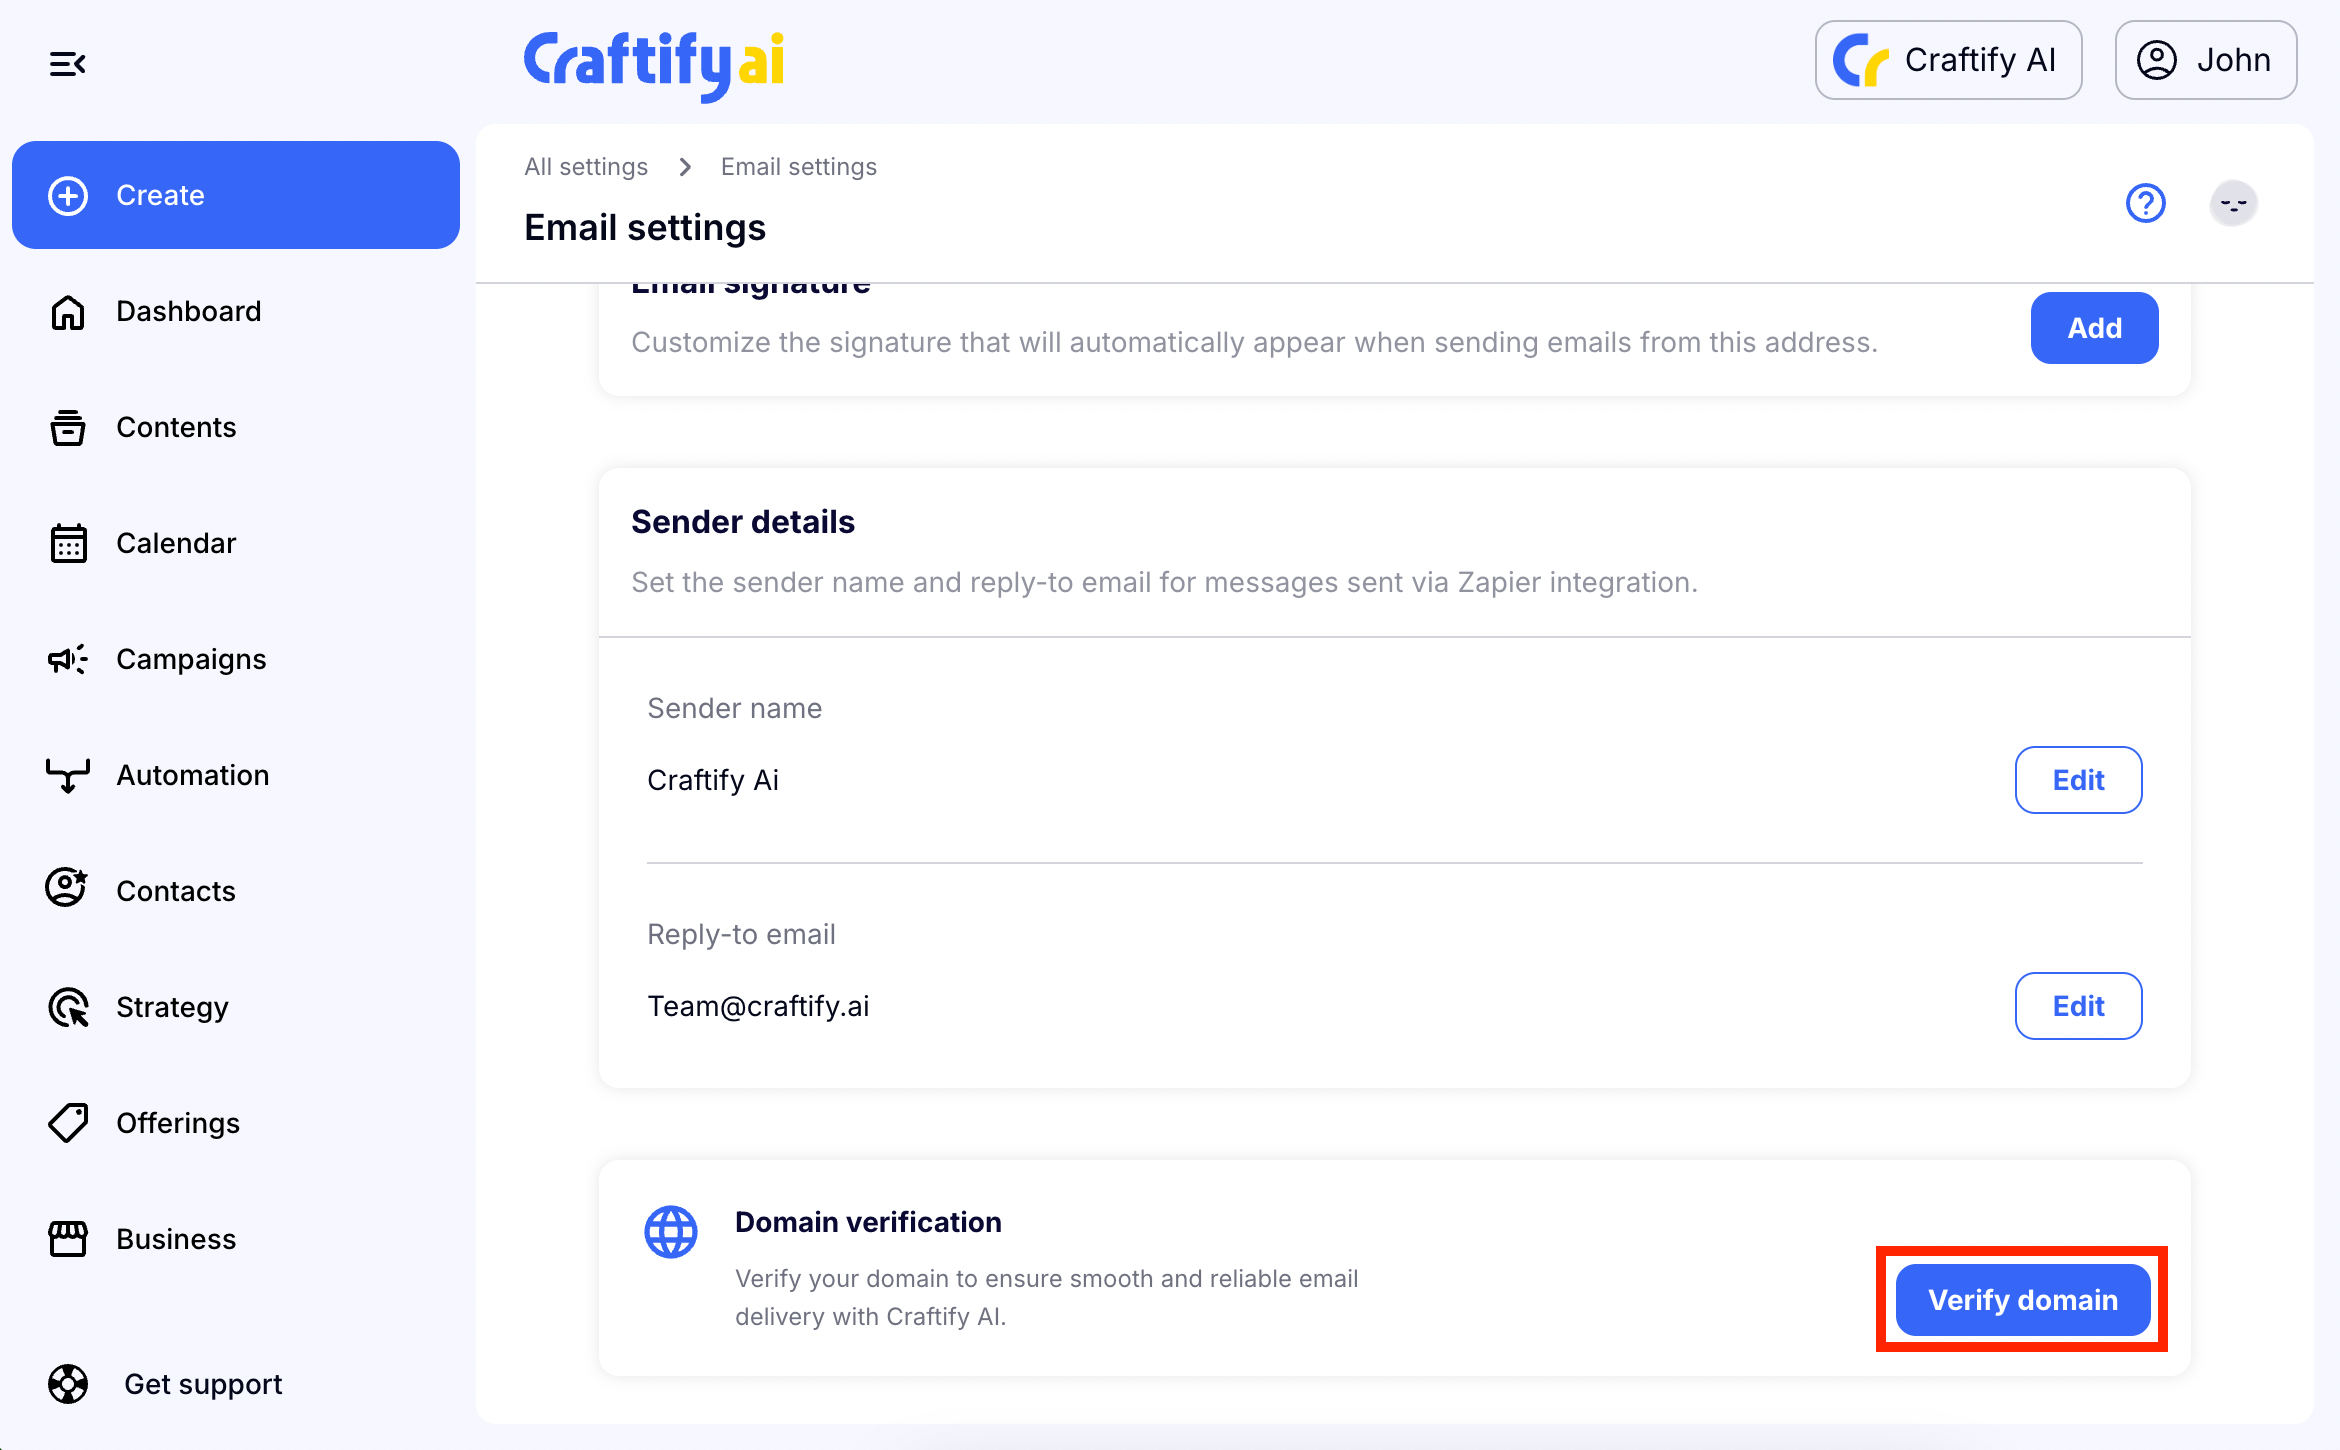
Step 3: Head back to Craftify AI Email Settings to set up your Domain
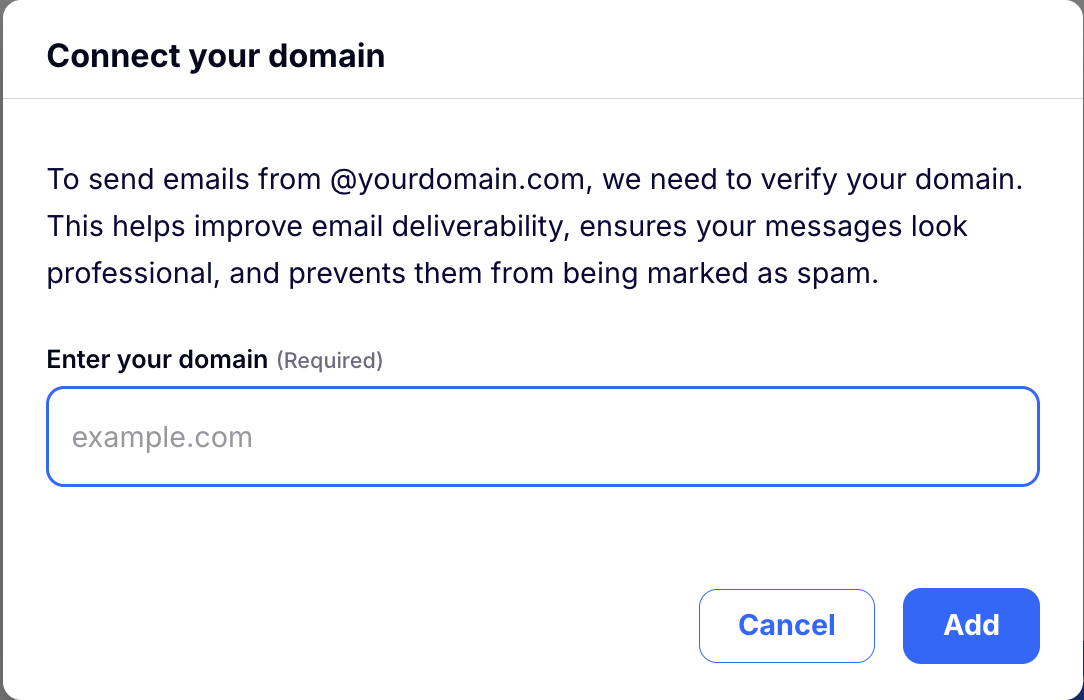
Scroll down and choose 'Verify Domain' to get started.
Input your domain name so that Craftify AI can generate the correct DNS settings for your website. Make sure to double check spelling here!
Step 4: Copy over the DNS settings
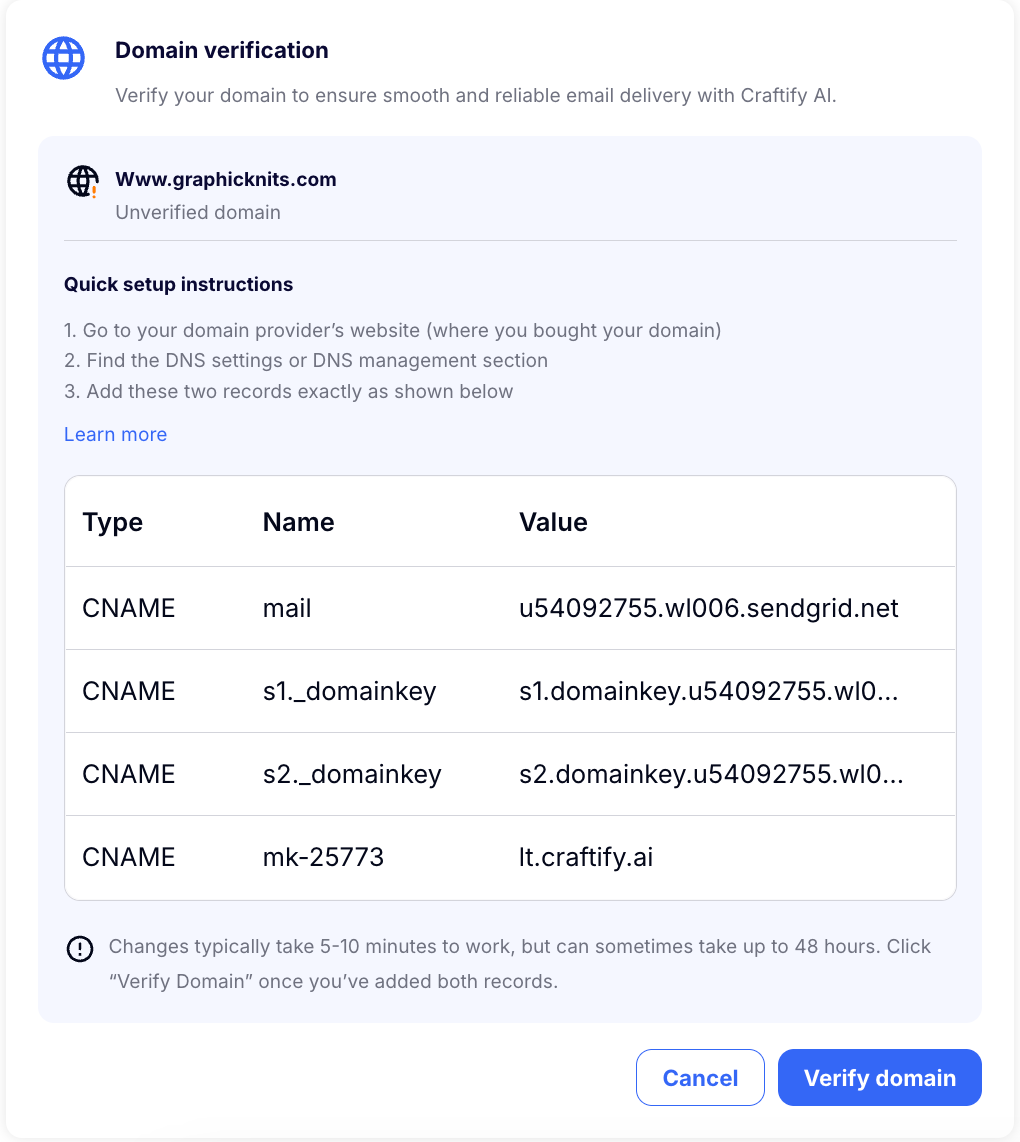
Craftify AI will automatically generate the advanced DNS settings for you to copy and past into your host domain site to connect Craftify AI to your domain.
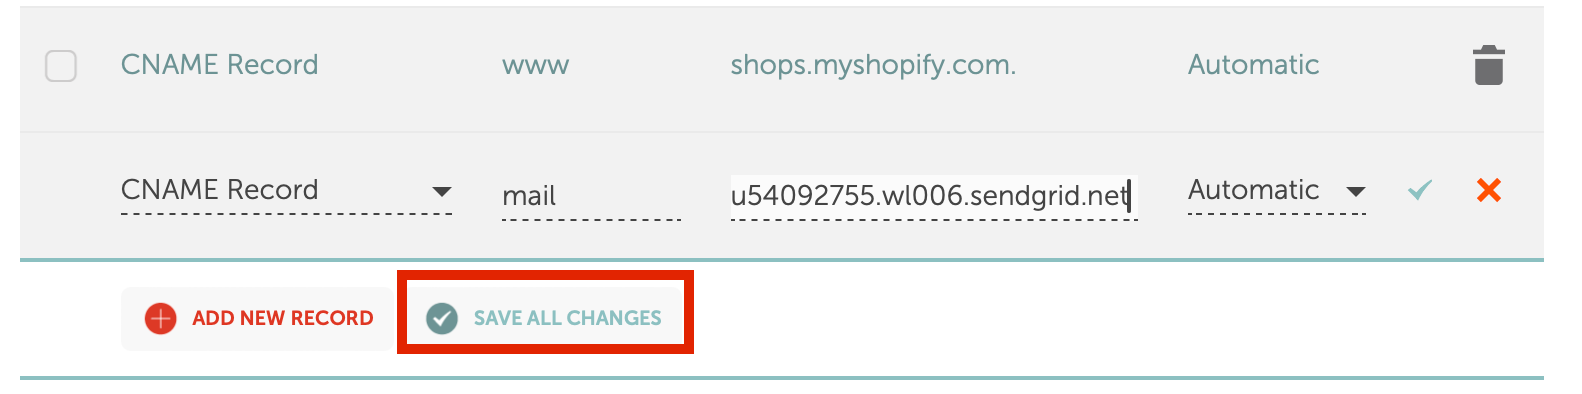
Copy over the 4 different domain DNS settings that Craftify AI has generated into your host site. You can do this by choosing 'Add new record' in your Advanced DNS settings on your host site.
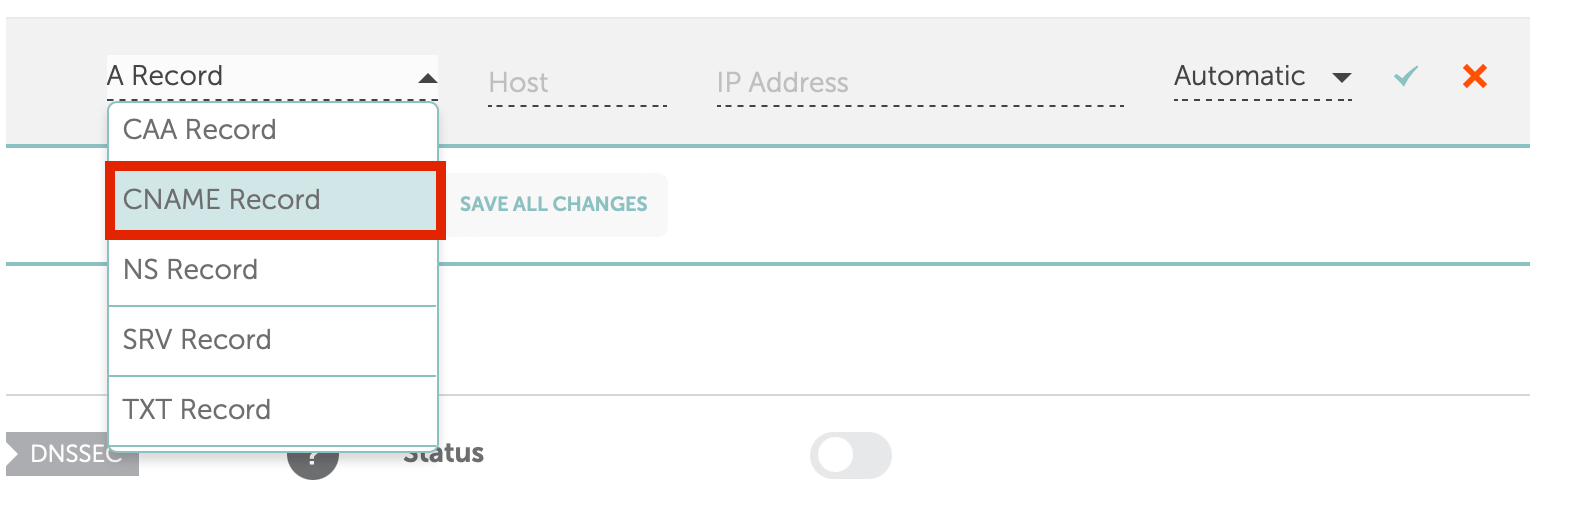
From here you will choose which type of record it is. In this example, you will see that all of the records are CNAME, however you could also see a MX, A, or TXT record as well. Choose the correct type from the drop down menu.
Then copy and paste the info for each record. There are 3 different sections to be sure are copied over, The type, then the name, and then the value.
Once you've copied all of the records over, choose 'Save' to start the verification process.
Step 5: Verify your domain
Usually it only takes 5-10 minutes to verify the domain, but in some cases it may take up to 48 hours for this Craftify AI verification to take action.
Check back in a couple of days to make sure that it's all set up! If it didn't work, then go back to verify that you copied over everything correctly.
Now it's time to scroll up and set up your Email Settings!
How to set up your Email Settings in Craftify AI
In this short tutorial, you will discover how easy it is to set up your Email Settings so that you can start sending out emails to your customers with ease!
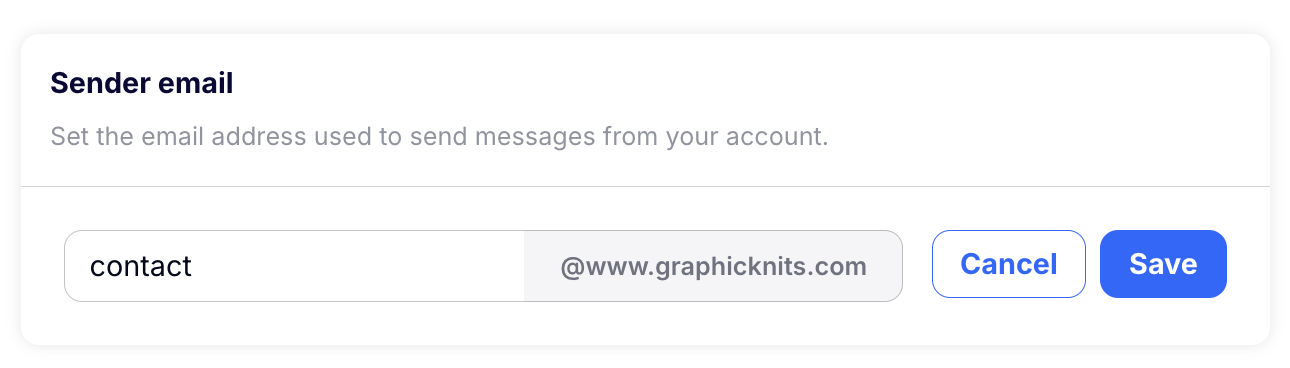
Step 1: Add Sender Email
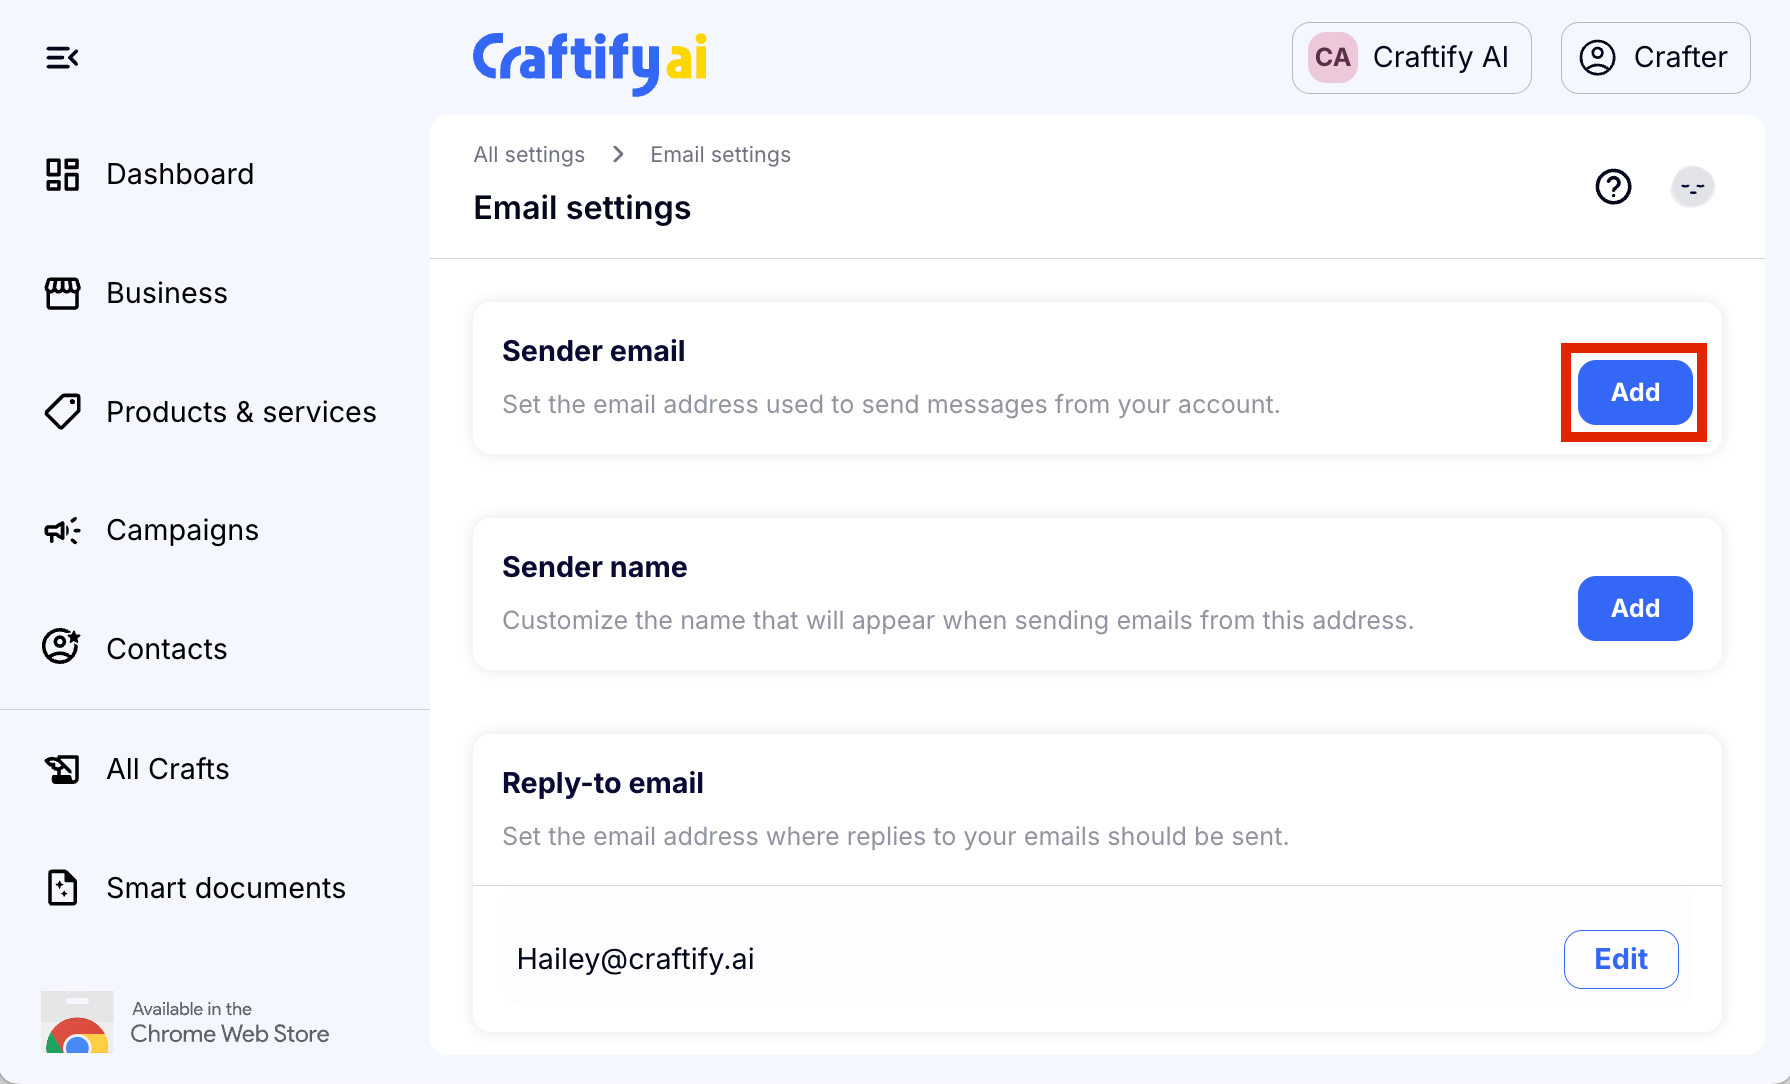
Choose 'Add' and you'll be given an email suggestion based on the Domain that you have connected to your Craftify AI account. You can choose the first part of this Sender Email! Choose 'Save' to move on to the next step.
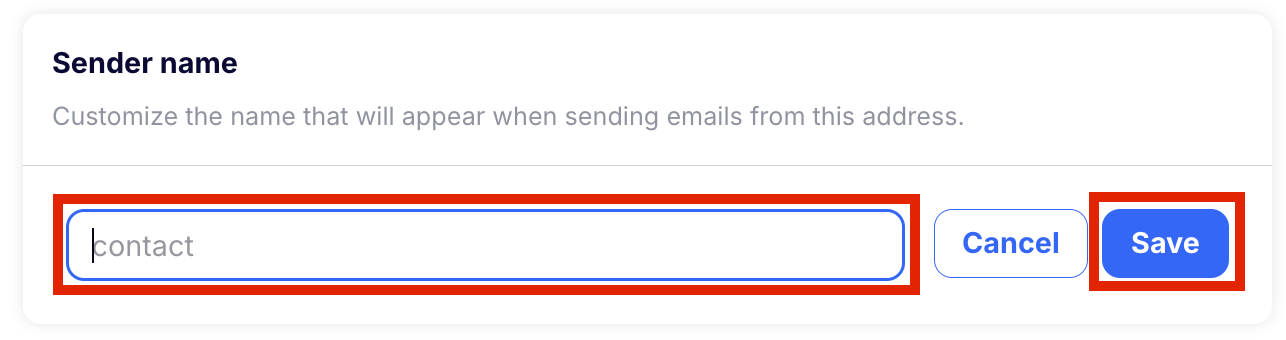
Step 2: Add Sender Name
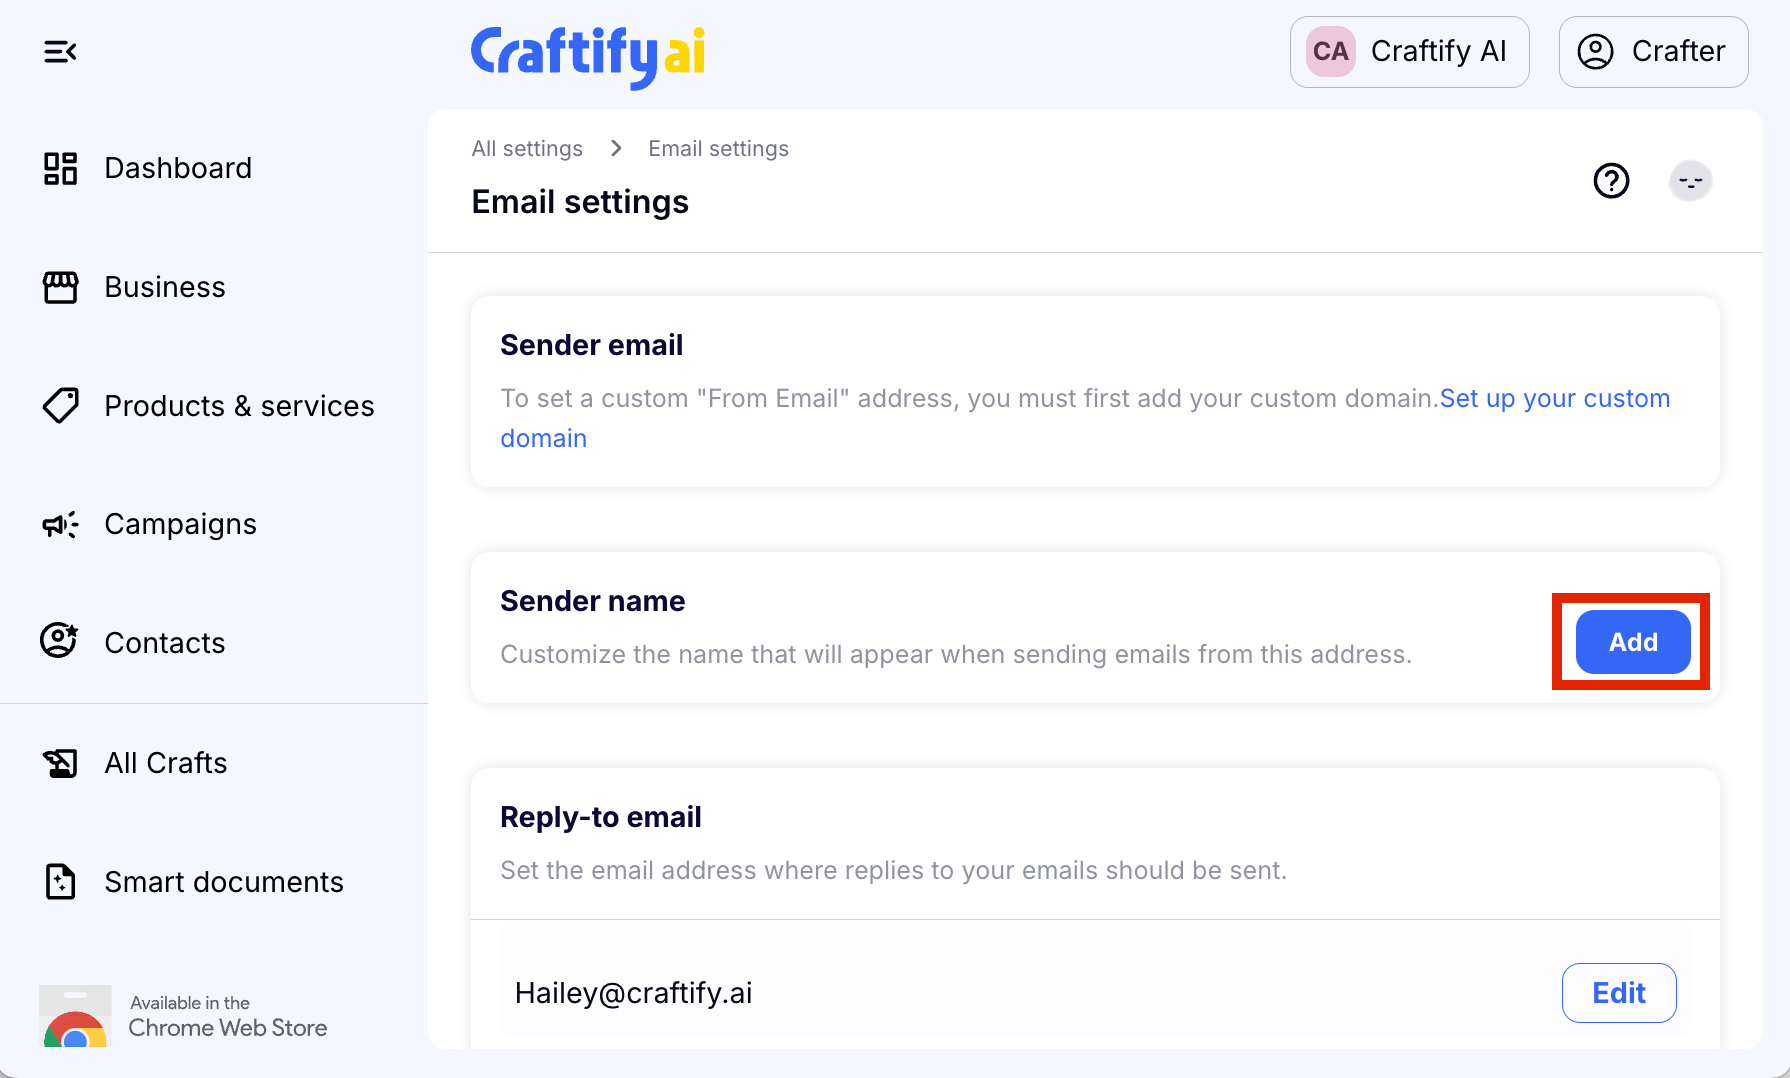
This is where you can personalise and let your audience know who is sending out the emails. You can choose to fill in this blank however you wish, but we recommend using either a name or a company name. Choose 'Save' to move on to the next step.
Step 3: Add or edit the Reply-to email
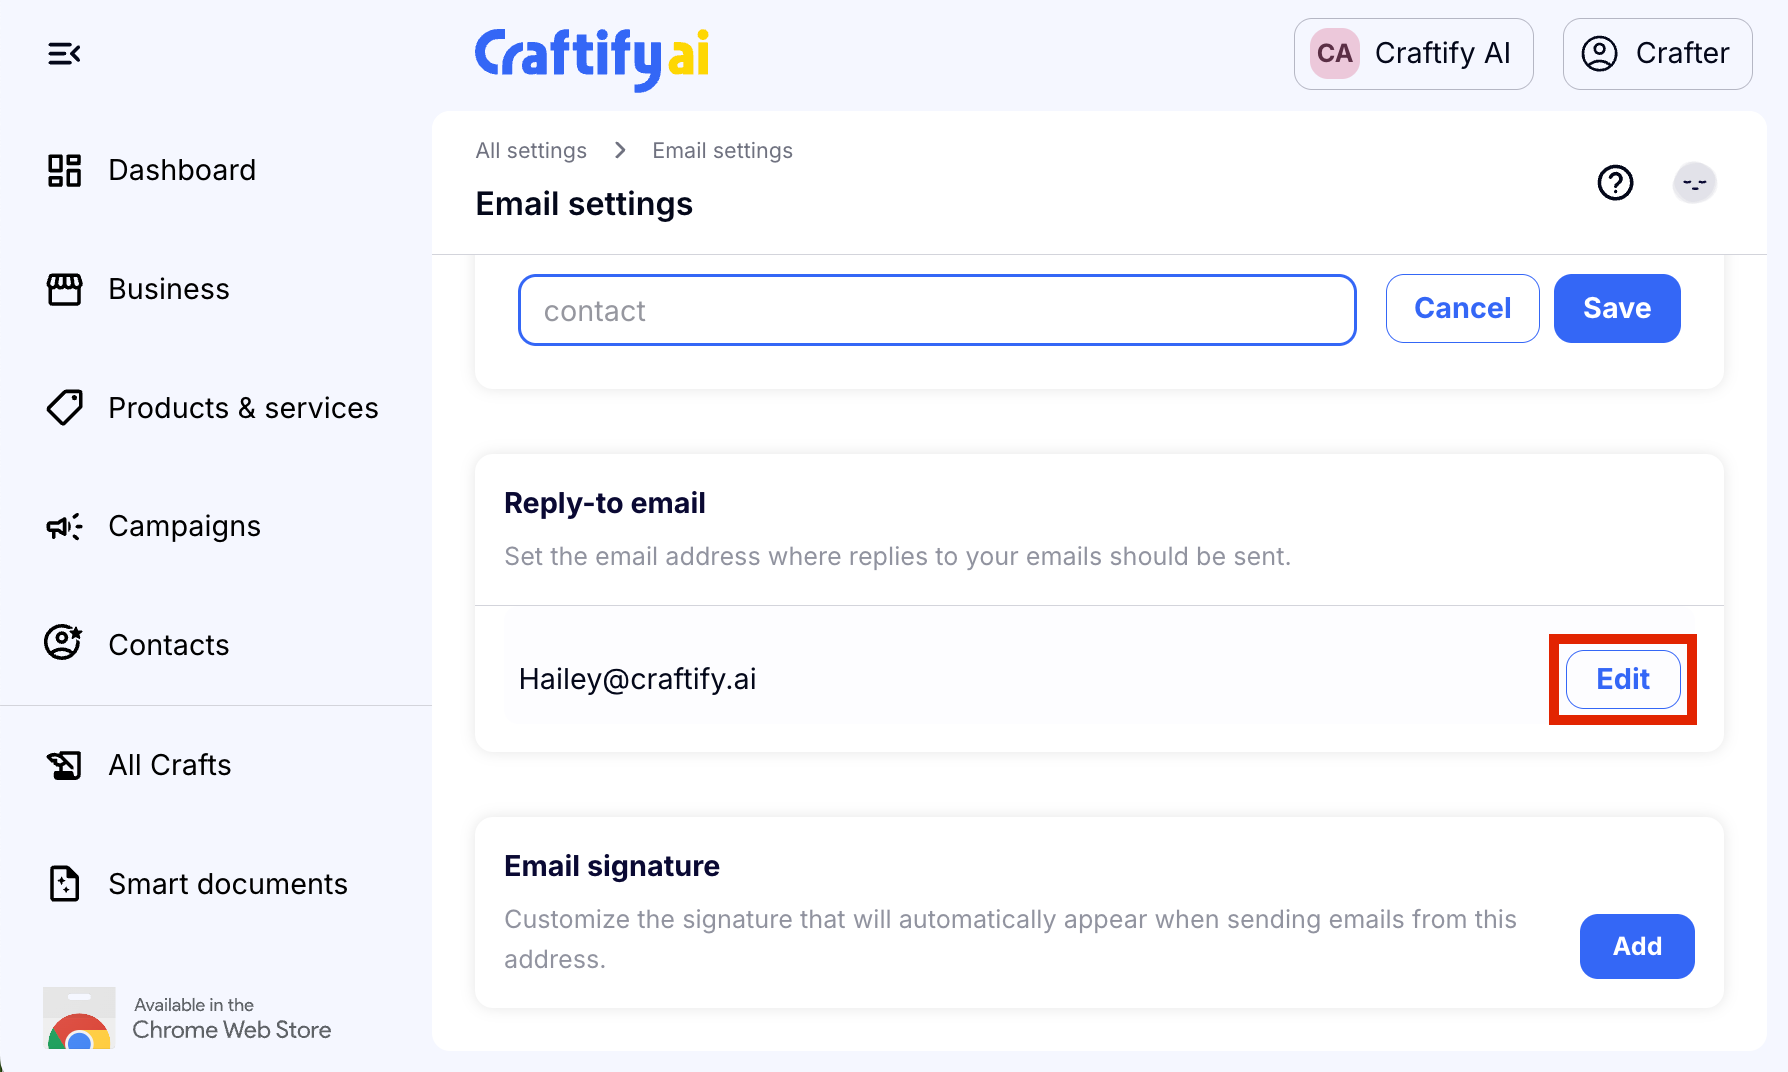
Automatically Craftify AI will use the email that you have registered with your account here. However, feel free to change this to any email you like! Make sure to double check your spelling, because this is where you will receive reply emails from your customers. So, you want it to be correct! Choose 'Save' to move on to the next step.
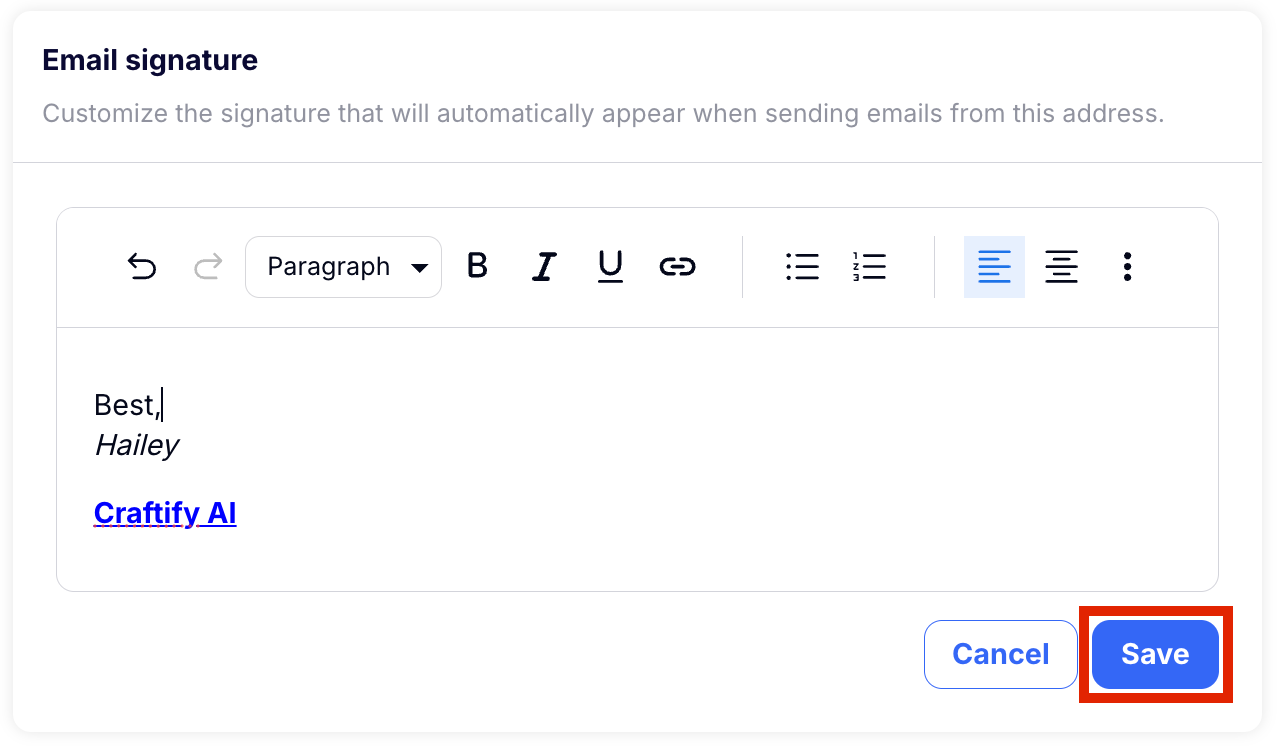
Step 4: Add your Email Signature
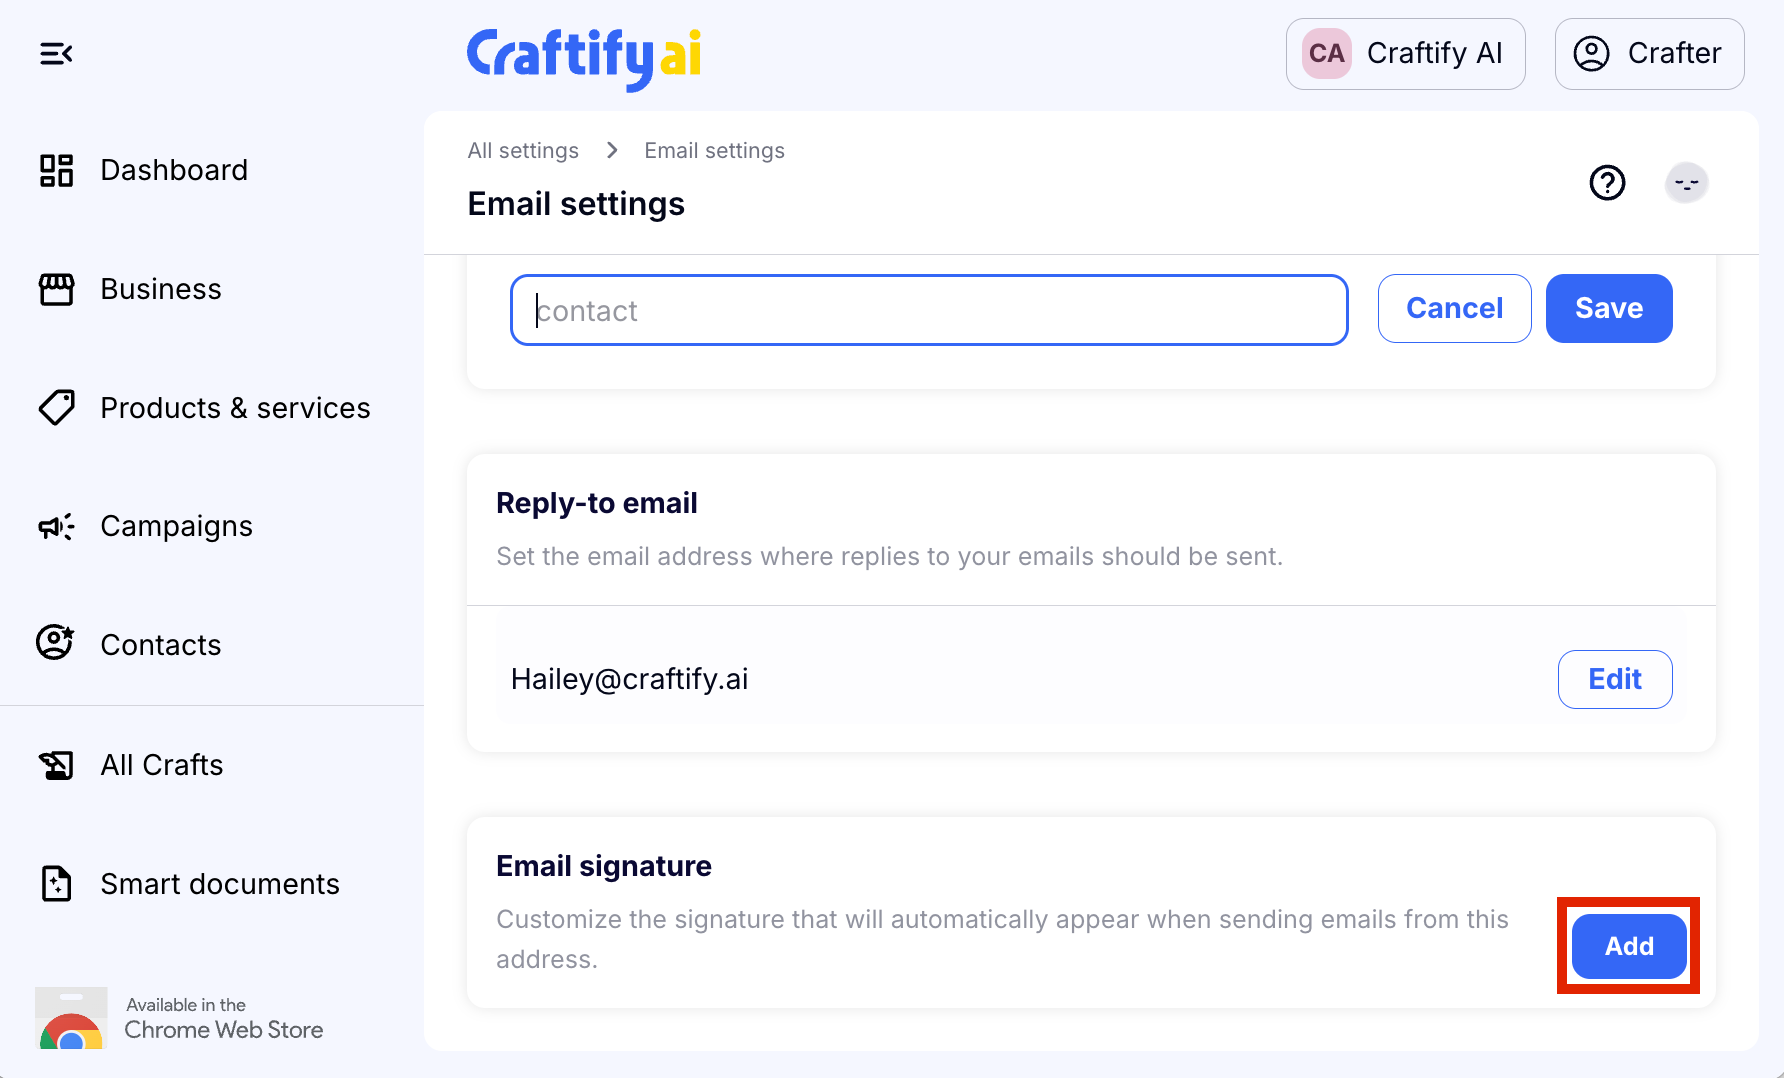
At the end of every email, you may wish to include a signature, which tells your reader who is sending the email, and maybe something else you want to add, like an inspirational quote, your company motto or mission statement, or a link to your website. You can get creative with this one or keep it simple, it's up to you! Choose 'Save' to finish and save your progress.
Told you it was super easy to set up your email settings!
Ready to start sending emails? HERE you can find a tutorial on how to use the email writer.